

Articles connexes

Whiteout Survival Frost Stars : Guide du meilleur rapport qualité-prix pour la 10e génération et au-delà

Coût de la super voiture Xena Live : Guide des prix 680K pièces (2026)

Recharge de pièces SuperLive : le bonus PK de 1,5x bat les achats de panique

Le bonus de 500 diamants Bigo Live se termine aujourd'hui : Guide du tirage au sort
Genshin Impact 6.1 Tier List: Best Characters Guide
Genshin Impact 6.1 Tier List: Best Characters Guide
Buffget
This Genshin Impact 6.1 tier list analyzes the strongest characters across DPS, Support, and F2P categories following the October 22, 2025 update. New meta shifts emphasize Lunar-Bloom reactions and Nefer's introduction as S-tier Dendro DPS. Rankings cover SS to D-tier with specific build requirements, investment priorities, and team synergies.
What's Actually Worth Your Time in 6.1
How We're Ranking These Characters
Look, I've been doing this for years, and the 6.1 meta is honestly refreshing. We're finally seeing some real shake-ups that matter.
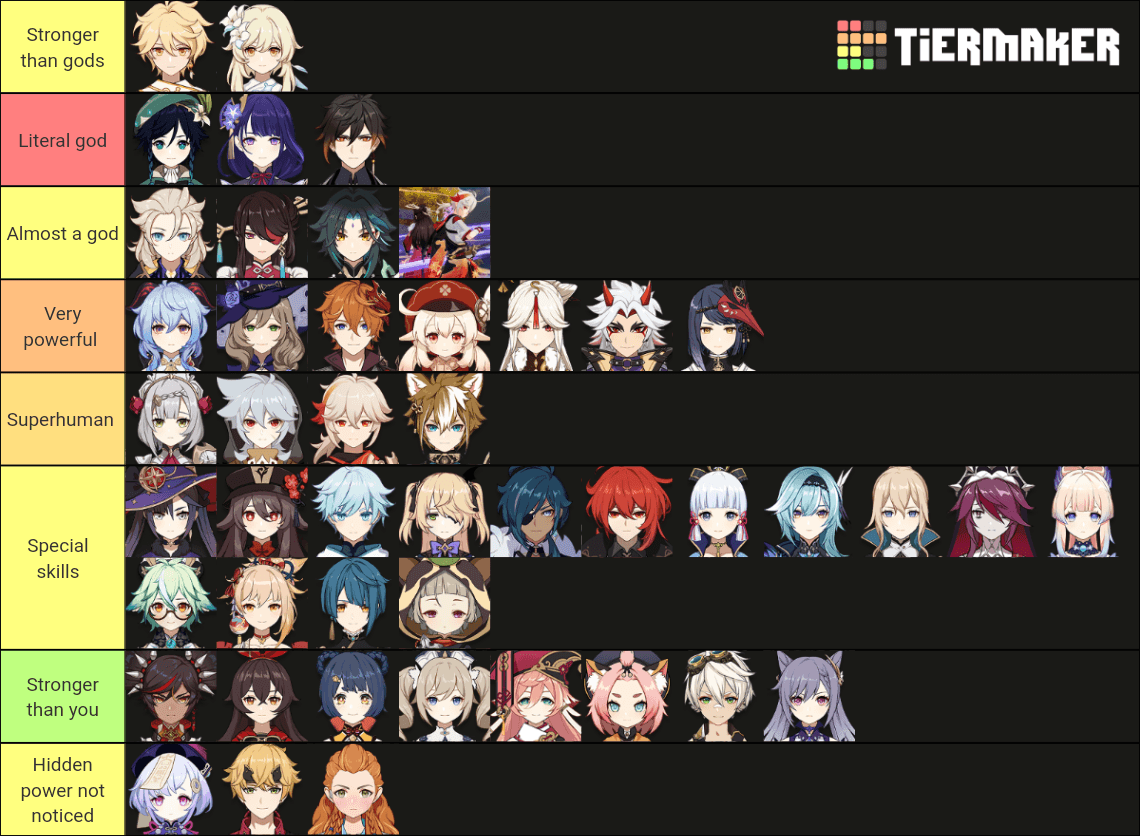
The ranking system here isn't rocket science. SS-tier characters dominate endgame content without making you sell a kidney for artifacts. S-tier hits peak performance when you actually invest properly (shocking, I know). A-tier needs maximum investment to compete—think perfect substats and signature weapons. B-tier fills niches well enough. C-tier works but you'll replace them eventually. D-tier... well, let's just say there's a reason they're down there.
Here's what I'm focusing on: C0 performance in realistic teams. Because let's be honest—most of us aren't whaling for C6 everything. The new Lunar-Bloom mechanics favor CRIT scaling over traditional multipliers, which is actually pretty clever design-wise. It rewards smart building over just stacking ATK%.
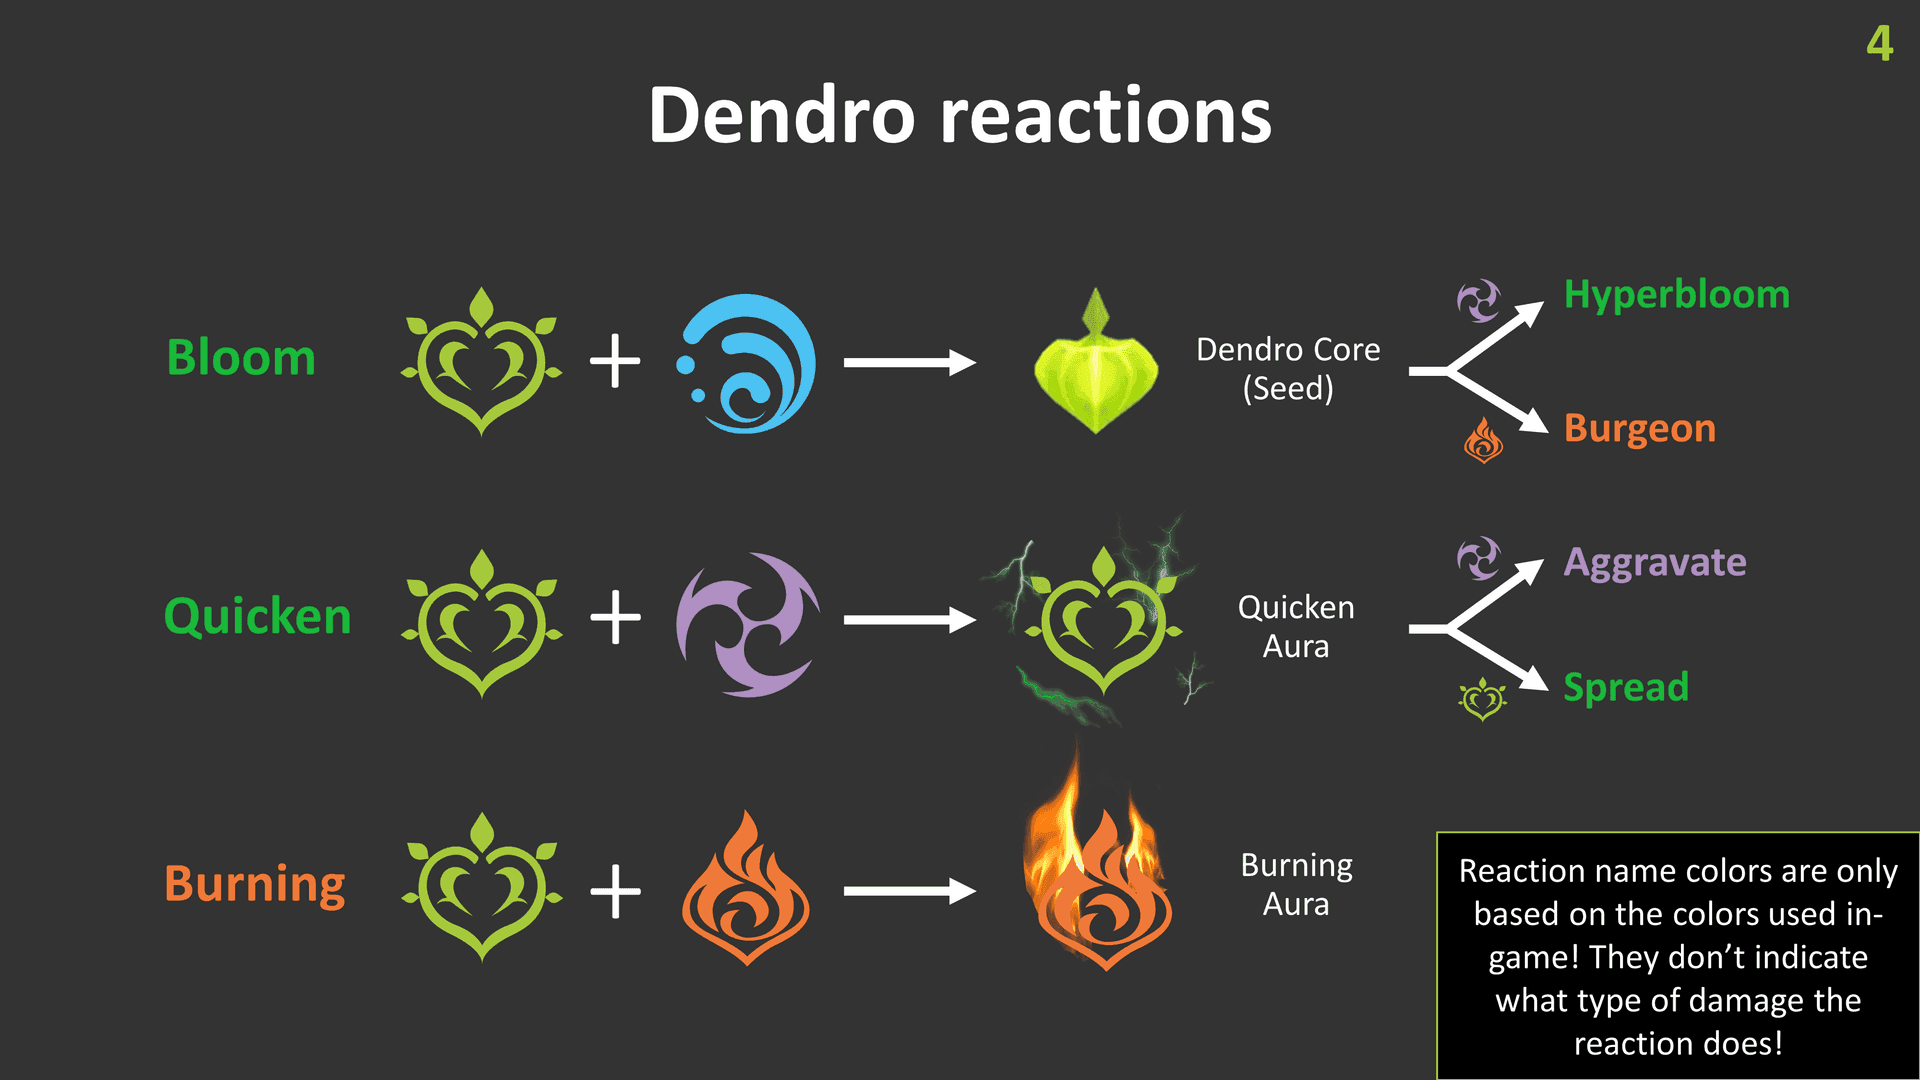
Version 6.1 brings some serious changes. Nefer's Lunar-Bloom mechanics are genuinely innovative, and Escoffier's utility boost makes Cryo teams scary good again. The meta's shifting toward reaction-based damage scaling—particularly those Dendro+Hydro combinations that let Bloom reactions actually CRIT.
For players serious about roster optimization, getting the characters you need becomes crucial. The Genshin Impact top up service on buffget offers competitive pricing with instant delivery—no waiting around or sketchy third-party sites.
What Actually Matters for Performance
Rankings consider the stuff that actually impacts your gameplay: single-target damage, AoE capabilities, how often they apply elements, energy requirements, and constellation scaling. The statistical thresholds I use are 1:2 CRIT ratios for DPS units, 180-200% Energy Recharge for Sub-DPS, and 200+ Elemental Mastery for reaction enablers.
My verification process is pretty straightforward: identify the role, cross-reference multiple sources, validate stats, test rotations, then adjust for F2P reality.
The Meta Kings: S-Tier Characters
DPS That Actually Matter
The SS-Tier Powerhouses: Mavuika, Skirk, Neuvillette, and Arlecchino are in a league of their own right now.
Mavuika's versatility is honestly impressive—she excels in Vaporize/Melt comps using A Thousand Blazing Suns with Obsidian Codex 4pc. What makes her special is the dual functionality: on-field damage dealer AND off-field Pyro support through those Nightsoul mechanics. Her C0 performance rivals other SS carries, but C2 adds energy support that makes team building way more flexible.
Skirk dominates Freeze teams, especially with Escoffier support. Those wide AoE normals during Seven-Phase state are satisfying to use, and the Azurelight weapon with Finale of the Deep Galleries 4pc just works. Neuvillette maintains his throne through sheer consistency—reliable Hydro damage without the headaches. Arlecchino delivers that high Pyro damage in Vaporize/Overload teams with swift AoE normals that feel responsive.
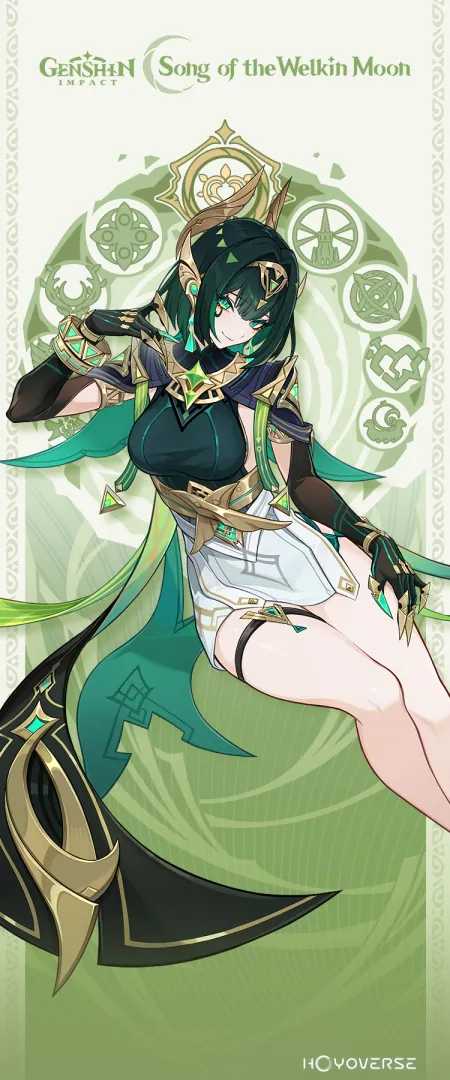
The S-Tier Standout: Nefer's debut as premier Dendro DPS is genuinely exciting. The Lunar-Bloom mechanics convert Dendro cores to Seeds of Deceit for enhanced Charged Attacks under Ascendant Gleam—it's more engaging than it sounds. Optimal performance needs Lauma support and Hydro enablers like Aino. The Reliquary of Truth provides 88.2% CRIT DMG with specialized Lunar-Bloom bonuses, which is exactly what this playstyle needed.
Support Characters That Enable Everything
SS-Tier Support Foundation: Furina, Xilonen, Bennett, and Kazuha form the backbone of most meta teams—and for good reason.
Furina's universal buffs and healing through HP drain synergies make her incredibly flexible. Using Splendor of Tranquil Waters with Golden Troupe 4pc gives you semi-infinite off-field Hydro application. She works in Vaporize, Bloom, reaction teams—basically everything. That's rare versatility.
Bennett remains irreplaceable (yes, even in 2025) with ATK buffs up to 1000, healing, and that C6 Pyro infusion. His Noblesse 4pc setup with 200% ER enables spam potential across most compositions. Xilonen delivers multi-element RES shred and healing with Peak Patrol Song and Scroll of Hero 4pc. Kazuha provides Swirl damage, EM buffs, and crowd control that's essential for about 80% of meta teams.
The New Players: Lauma enables Lunar-Bloom damage through Bloom CRITs with Nightweaver's Looking Glass and Deepwood Memories 4pc—crucial RES shred for Bloom/Hyperbloom reactions. Citlali offers specialized Melt/Freeze support with Starcaller's Watch, delivering long-duration shields and Hydro/Pyro damage amplification.
The F2P Dream Team
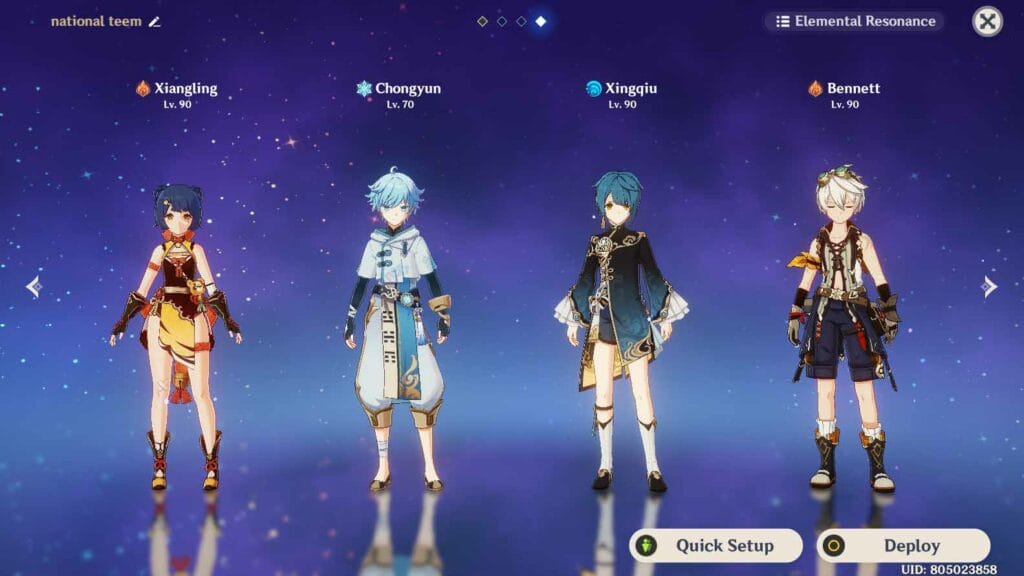
The National Team composition (Xiangling, Xingqiu, Bennett, Sucrose) maintains SS-tier status for a reason—accessibility and consistent Abyss clearing. This core provides Vaporize reactions, EM buffs, and healing within 20-second rotations using only free weapons and farmable artifacts.
Xingqiu achieves SS-tier Sub-DPS ranking through off-field Hydro application, damage reduction, and healing with Sacrificial Sword and Emblem 4pc. His C6 maximizes frequency while maintaining 100% uptime. Xiangling complements perfectly with frequent Burst snapshots and AoE Pyro application that scales beautifully with Bennett's ATK buffs.
A-Tier: Still Strong, But Requires Investment
DPS Options That Need Work
A-Tier Reality Check: Alhaitham drops to A-tier despite excellent Dendro application—he's been outscaled by Kinich and Nefer in this Dendro meta shift toward Lunar-Bloom reactions. He's still strong in Spread/Hyperbloom compositions with Light of Foliar Incision and Gilded Dreams 4pc, but needs more investment for competitive damage.
Navia secures A-tier with frontloaded Skill damage capable of one-shots using Verdict and Nighttime Whispers 4pc. Her Geo damage benefits from Crystallize shields while staying independent from reaction requirements. Ayaka provides permanent Cryo infusion and strong Burst damage but faces stiff competition from newer Cryo options.
A-tier characters need full team optimization to match SS-tier performance. That's just the reality. Raiden achieves hypercarry potential during her 7-second Burst window, particularly at C2. Hu Tao maintains high single-target damage in Vaporize teams with proper animation canceling and HP management—but the skill ceiling is real.
Support Characters with Conditions
A-Tier Support Reality: Nahida provides 250 EM Burst buffs with C2 reaction enhancements, using A Thousand Floating Dreams and Deepwood Memories 4pc for off-field Dendro application. Her performance scales with team EM investment and reaction frequency—essential for Hyperbloom and Spread compositions.
Zhongli offers the strongest shield and RES shred with Staff of Homa, providing universal utility and interruption resistance. His petrify Burst adds crowd control value, though Xilonen competes in some meta compositions. Jean delivers crowd control, healing, and C4 Anemo RES shred for versatile team support.
Escoffier achieves dual SS-tier Sub-DPS and S-tier Support rankings through Freeze RES shred and healing with Symphonist of Scents and Golden Troupe 4pc. His 100% uptime and reaction-tied performance make him essential for Cryo/Hydro compositions, particularly alongside Skirk in Freeze meta.
B-Tier: Niche but Functional
Specialists That Work in Specific Situations
B-Tier DPS Reality: Tartaglia maintains strong Hydro application for Vaporize teams with Polar Star and Nymph's Dream 4pc—excellent in AoE scenarios but needs specific team compositions. Ganyu provides Charged Shot Melt damage with significant AoE potential, but those slow charge times and vulnerability during aimed shots hurt her ranking.
Itto delivers high Charged Attack and Skill damage during Burst state with substantial investment requirements. His Geo damage independence from reactions provides consistency but limits ceiling potential compared to reaction-based DPS units.
Support Characters with Strings Attached
B-Tier Support Niches: Yun Jin provides normal attack damage buffs scaling with multi-element teams—peak effectiveness at C6 with speed bonuses. Sara delivers ATK buffs with C6 Electro damage bonuses but suffers from clunky application mechanics requiring precise timing.
Beidou provides arcing Electro damage with high ER requirements and Serpent Spine scaling—strong performance in Electro-Charged teams. Kaeya delivers consistent Cryo application and Burst damage with low investment requirements, making him accessible for F2P Freeze or Melt compositions.
DPS Rankings: Who Hits Hardest in 6.1
Single-Target Monsters
Single-Target Excellence: Neuvillette dominates single-target scenarios through consistent Hydro damage and self-sufficiency—minimal team support needed while delivering exceptional damage scaling. His Charged Attack mechanics provide sustained damage without energy constraints, ideal for boss encounters and single-enemy floors.
Arlecchino excels in single-target Vaporize compositions with Crimson Moon's Semblance and Fragment of Harmonic Whimsy 4pc. Those swift normal attack chains and Pyro application create consistent reaction opportunities while maintaining high personal damage. C1 reduces interruption vulnerability, enhancing her single-target focus.
Nefer's Lunar-Bloom mechanics excel against single targets through concentrated Charged Attack damage via Seeds of Deceit absorption. Her synergy with Lauma and Hydro enablers creates powerful single-target burst windows—particularly effective against high-HP enemies in Abyss encounters.
AoE Damage Champions
AoE Excellence: Mavuika provides exceptional AoE coverage through Nightsoul mechanics and Burst buffs for active characters. Her Vaporize/Melt potential with A Thousand Blazing Suns creates significant AoE damage while maintaining off-field utility.
Skirk delivers wide AoE normal attacks during Seven-Phase state—particularly effective in Freeze teams with Escoffier support. Her Azurelight weapon and Finale of the Deep Galleries 4pc enhance AoE potential while providing exploration utility through Natlan traversal mechanics.
Varesa achieves high Plunge damage without amplifying reactions, using Vivid Notions and Long Night's Oath 4pc for consistent AoE coverage. Her compatibility with buffers like Iansan and exploration utility in Natlan make her versatile for both combat and overworld content.
Reaction Specialists
Reaction Mastery: Kinich specializes in Burning/Burgeon single-target damage with Fang of the Mountain King and Obsidian Codex 4pc. His mobile grapple mechanics and CRIT-focused one-shot potential make him effective for reaction-based team compositions, particularly outside Natlan regions.
For players looking to optimize their reaction teams, acquiring necessary characters and weapons requires substantial Primogem investment. The buy Genshin Impact Primogems option through buffget provides secure transactions with competitive rates and immediate delivery—no account safety compromises.
Mualani and Chasca provide specialized reaction driving capabilities. Mualani focuses on Hydro-based reactions while Chasca offers unique elemental combinations. Their performance scales with proper team construction and reaction optimization—they need specific support characters for maximum effectiveness.
Support Meta: Who Enables Your Teams
Defensive Powerhouses
Premier Defense: Zhongli maintains the strongest shield in the game with Staff of Homa—universal RES shred and interruption resistance. His petrify Burst adds crowd control value while his shield scales with HP investment, offering consistent protection across all content types.
Citlali delivers specialized Melt/Freeze support with long-duration shields and Hydro/Pyro damage amplification. Her Starcaller's Watch and Scroll of Hero 4pc setup provides both defensive utility and offensive support—essential for Cryo-focused team compositions.
Bennett combines healing with ATK buffs up to 1000 and Pyro infusion at C6, using Noblesse 4pc with 200% ER for consistent uptime. His base ATK scaling ensures relevant buffs throughout progression while providing essential healing for aggressive playstyles.
Buffer Excellence
Elite Buffers: Kazuha provides Swirl damage, EM buffs, and crowd control essential for reaction teams—using Freedom-Sworn weapon for enhanced Swirl damage by 60%. His Viridescent Venerer 4pc delivers -40% RES shred while grouping enemies for improved AoE effectiveness.
Xilonen offers multi-element RES shred and healing with Peak Patrol Song and Scroll of Hero 4pc, competing with Zhongli in some compositions through offensive support rather than pure defense. Her versatility across multiple elements makes her valuable for diverse team constructions.
Furina provides universal team damage bonuses through HP drain mechanics—requires AoE healers for optimal performance. Her Splendor of Tranquil Waters and Golden Troupe 4pc setup enables semi-infinite off-field Hydro application with consistent team buffs.
Elemental Application Masters
Application Excellence: Xingqiu achieves SS-tier Sub-DPS status through off-field Hydro application, damage reduction, and healing with Sacrificial Sword enabling cooldown resets. His C6 maximizes application frequency while maintaining 100% uptime for reaction enablement across multiple team archetypes.
Lauma enables Lunar-Bloom damage through Bloom CRITs with Nightweaver's Looking Glass and Deepwood Memories 4pc—crucial RES shred for Bloom/Hyperbloom reactions. Her synergy with Nefer creates powerful reaction-based team compositions focused on CRIT-scaling damage.
Nahida delivers off-field Dendro application with multi-target capabilities, using A Thousand Floating Dreams and Deepwood Memories 4pc for reaction support. Her C2 enhances reaction damage while providing EM buffs for team-wide reaction scaling.
F2P Guide: Maximum Value, Minimum Spending
The 4-Star All-Stars
SS-Tier F2P Foundation: Bennett, Xiangling, and Xingqiu form the F2P foundation with exceptional performance accessibility. Bennett provides flexible ATK buffs up to 1000 with healing and Pyro infusion—only needs basic investment for maximum utility. Xiangling delivers frequent Burst snapshots with AoE Pyro application, scaling beautifully with Bennett's buffs and The Catch weapon from fishing.
Xingqiu offers off-field Hydro application, damage reduction, and healing for Vaporize/Bloom reactions with Sacrificial Sword and Emblem 4pc. His performance rivals 5-star alternatives while being completely accessible through wishes and events.
S-Tier F2P Options: Fischl provides consistent off-field Electro application with Oz—essential for Electro-Charged and Hyperbloom teams. Sucrose delivers EM buffs and crowd control with Viridescent Venerer 4pc, offering -40% RES shred and Swirl damage for reaction teams. Collei enables Dendro reactions with basic investment, particularly valuable for Hyperbloom compositions.
Free Character Mastery
National Team Excellence: The National Team composition (Xiangling, Xingqiu, Bennett, Sucrose) provides Abyss-clearing potential with free weapons and farmable artifacts. The rotation involves Bennett Burst for ATK buffs, Xiangling Guoba/Skill for Pyro application, Xingqiu Burst for Hydro reactions, and Sucrose Swirl for grouping and EM buffs within 20-second cycles.
Hyperbloom F2P Alternative: Collei (Dendro), Xingqiu (Hydro), Lisa (Electro), and Sucrose (Anemo) create powerful reaction synergy with accessible characters. The rotation prioritizes Collei Skill for Dendro application, Xingqiu Burst for Bloom creation, Lisa Burst for Hyperbloom triggers, and Sucrose Swirl for EM enhancement.
Smart Resource Management
Investment Priorities: Level Xiangling to 90 with talents at 8/8/10, farming Emblem domain for ER/CRIT optimization. Acquire The Catch through fishing for optimal weapon choice, then build National Team core before expanding roster. Focus on achieving 200% ER for Burst uptime and 1:2 CRIT ratios for damage optimization.
Artifact Farming Efficiency: Prioritize Emblem of Severed Fate domain for Xiangling and Xingqiu—universal Sub-DPS artifacts. Viridescent Venerer for Sucrose enables RES shred, while Noblesse 4pc for Bennett maximizes team buffs. Target 20 domain runs for basic sets before pursuing perfect substats.
Constellation Value: C4 Xiangling extends Burst duration significantly, while C6 Xingqiu maximizes application frequency. Bennett C1 removes HP restriction for healing, and Sucrose C6 provides elemental damage buffs. Prioritize these constellations through events and starglitter exchange for maximum F2P efficiency.
What's Changed in 6.1 (And Why It Matters)
New Character Impact
Nefer's Game-Changing Mechanics: Nefer's introduction as S-tier Dendro DPS genuinely redefines Dendro team compositions through Lunar-Bloom mechanics. Her ability to convert Dendro cores to Seeds of Deceit for enhanced Charged Attacks creates new reaction scaling opportunities—particularly with Lauma support and Hydro enablers like Aino.
Her Reliquary of Truth signature weapon provides 88.2% CRIT DMG with specialized Lunar-Bloom bonuses, enhancing reaction damage by 50% when stacked. The character requires CRIT Rate/DMG 1:2 ratios, 200+ EM, and 180-200% ER for optimal performance. C1 improves CRIT ratios and reduces team restrictions.
Phase 1 banners from October 22 to November 11, 2025, feature Nefer and Furina—emphasizing Lunar-Bloom and universal support synergy. The Epitome Invocation includes Reliquary of Truth and Splendor of Tranquil Waters, providing optimal weapons for both featured characters.
Balance Shifts That Actually Matter
Tier Movement Analysis: Alhaitham drops to A-tier despite excellent Dendro application—outscaled by Kinich and Nefer in the meta shift toward Lunar-Bloom reactions. Navia similarly moves to A-tier, requiring increased investment for competitive performance against newer options.
Escoffier receives upgrades to SS-tier Sub-DPS status through enhanced Freeze utility and RES shred capabilities with 100% uptime. His synergy with Skirk in Freeze compositions creates dominant team archetypes for Cryo-focused content.
Lunar-Bloom reactions incorporate CRIT scaling and EM, amplifying reaction damage through core absorption mechanics. This shift favors characters with strong CRIT ratios and EM investment over traditional ATK scaling—impacting build priorities across multiple characters.
Team Building That Actually Works
Core Compositions Worth Building
Lunar-Bloom Excellence: Nefer (Main DPS), Lauma (Support), Aino (Hydro enabler), and Nahida (Dendro application) create the premier Lunar-Bloom composition. The rotation involves Lauma Dendro application for cores, Aino Hydro for Bloom triggers, Nefer absorption of Seeds of Deceit for Charged Attacks, and Nahida EM boosts for reaction scaling within 20-second cycles.
Freeze Dominance: Skirk (Main DPS), Escoffier (Sub-DPS/Support), Furina (Hydro application), and Kazuha (crowd control) form powerful Freeze compositions. Skirk's wide AoE normals during Seven-Phase state synergize with Escoffier's RES shred and healing, while Furina provides consistent Hydro application and Kazuha enables grouping with VV shred.
National Variants: Traditional National Team (Xiangling, Xingqiu, Bennett, Sucrose) maintains effectiveness with accessible characters and weapons. Rational variant substitutes Raiden for Sucrose, providing energy generation and Electro application for enhanced damage potential.
Spiral Abyss Reality Check
Floor 12 Optimization: Current Abyss favors reaction-based damage and multi-target scenarios
, making Lunar-Bloom and Hyperbloom teams particularly effective. Nefer teams excel against single-target chambers, while AoE specialists like Mavuika and Skirk handle grouped enemy encounters.
Dual Team Strategy: First half prioritizes Freeze or Vaporize compositions with Skirk/Escoffier or Mavuika/Furina cores. Second half utilizes Dendro reactions with Nefer/Lauma or traditional National Team variants, ensuring elemental coverage across both chambers.
Maintain flexibility through character substitutions based on enemy types and Abyss buffs. Hydro-weak enemies favor Pyro DPS, while Cryo-weak encounters benefit from Dendro or Electro applications. Energy generation becomes crucial for consistent Burst uptime across extended encounters.
Investment Strategy: Where to Spend Your Resources
Early Game Foundation
Smart Starting Moves: Prioritize Bennett, Xiangling, and Xingqiu for immediate team functionality and long-term viability. These characters provide essential roles (healing, DPS, reaction enablement) while remaining relevant throughout progression. Focus on basic talent levels (6/6/6) and functional artifact sets before pursuing optimization.
Farm Emblem of Severed Fate domain for universal Sub-DPS artifacts—value for multiple characters simultaneously. Acquire The Catch through fishing for Xiangling's optimal weapon, then pursue Sacrificial Sword for Xingqiu through wishes or weapon banner pulls.
Build National Team core for consistent Abyss progression, ensuring proper rotation timing and energy management. Practice 20-second cycles for muscle memory development, focusing on Bennett Burst snapshots and Xingqiu application timing.
Mid-Game Expansion
5-Star Integration: Incorporate 5-star characters based on tier rankings and team needs—prioritize SS and S-tier options for maximum impact. Furina provides universal support value, while characters like Kazuha enhance multiple team archetypes through crowd control and buffs.
Pursue optimal artifact sets with proper main stats and basic substats, targeting 1:2 CRIT ratios for DPS and adequate ER for supports. Utilize artifact strongbox for Noblesse and Viridescent Venerer sets while farming newer domains for specialized pieces.
Evaluate weapon banner pulls based on character synergy and long-term value. Signature weapons provide significant upgrades for main DPS characters, while universal options like Favonius series support multiple characters across different roles.
Endgame Perfection
Optimization Phase: Refine artifact substats for maximum performance, targeting specific CRIT values and ER thresholds for optimal rotation timing. Utilize artifact routes and resin efficiency for consistent improvement without excessive resource waste.
Evaluate constellation value based on performance improvements and resource costs. C1 for many 5-star DPS characters provides significant upgrades, while support constellations often offer quality-of-life improvements rather than raw power increases.
Stay informed about upcoming character releases and meta shifts for informed investment decisions. Balance current performance needs with future-proofing considerations, avoiding over-investment in characters facing potential power creep or meta shifts.
FAQ
Who are the best DPS characters in Genshin Impact 6.1? SS-tier DPS characters include Mavuika, Skirk, Neuvillette, and Arlecchino—exceptional damage with minimal investment. S-tier options like Nefer, Varesa, and Kinich provide peak performance at recommended builds, with Nefer specializing in Lunar-Bloom reactions for Dendro teams.
Which support characters are meta in Genshin 6.1? Furina, Bennett, Kazuha, and Xilonen dominate SS-tier support rankings through universal utility and team enablement. Lauma emerges as essential for Lunar-Bloom compositions, while Escoffier excels in Freeze teams with RES shred and healing capabilities.
What are the best F2P characters in Genshin Impact 6.1? Bennett, Xiangling, and Xingqiu maintain SS-tier F2P status, forming the National Team core with exceptional accessibility and performance. Fischl, Sucrose, and Collei provide S-tier value for reaction teams—competitive alternatives to 5-star characters.
How has the Genshin Impact meta changed in version 6.1? The meta shifts toward Lunar-Bloom reactions with CRIT scaling, favoring characters like Nefer and Lauma. Cryo dominance continues through Escoffier's enhanced utility, while traditional Dendro characters like Alhaitham face increased competition from specialized reaction drivers.
Which characters should I prioritize for Spiral Abyss in 6.1? Prioritize reaction-based teams with Nefer/Lauma for Lunar-Bloom or Skirk/Escoffier for Freeze compositions. National Team variants remain effective for F2P players, while Furina provides universal support value across multiple team archetypes for consistent Abyss clearing.
Are 4-star characters viable in Genshin Impact 6.1 endgame? Absolutely. 4-star characters like Bennett, Xiangling, and Xingqiu achieve SS-tier rankings and remain essential for endgame content. The National Team composition clears Abyss 12 with proper investment, while characters like Fischl and Sucrose provide competitive alternatives to 5-star options in specialized roles.