

Related articles


Arena Breakout Lockdown: Best Solo Loot Routes 500k+
Quick Answer: Lockdown Mode requires level 14, 30,000 Koen minimum gear value, and a 5,000 Koen entry fee. Solo players targeting 500k+ Koen per run should prioritize Northridge Hotel (500k–800k yield), Valley Beach Villa (300k–500k yield), and Farm Motel locked safes (200k–400k yield). Keep your loadout under 100k Koen, route away from squad hotspots, and extract once loot value exceeds 3x your gear cost.
Buffget
What Is Arena Breakout Lockdown Mode?
Lockdown Mode is Arena Breakout's highest-intensity extraction format — maximum loot density, elevated risk, real financial consequences on death. Entry requires level 14, 30,000 Koen minimum gear value, and a 5,000 Koen entry fee per raid.
How It Differs from Standard Matches
Lockdown concentrates higher-tier loot containers, more aggressive AI, and denser player populations into each session. Farm supports 12 simultaneous players; Valley and Northridge each support up to 20. That population density is the biggest variable affecting solo survival.
Extraction Points, Costs, and Conditions
Don't drop in without knowing these:
- Southern Blockade: 2,000 Koen to use
- Standard Lockdown extraction: 6,000 Koen
- Valley Helipad: Requires 2 player dogtags — forces engagement over passive looting
- Dam Sluice Gate: Requires second-floor console activation before it's usable
Why Solo Players Have a Structural Edge
Solo survival rate benchmarks at 30% vs. 50% for squads — but that gap misrepresents the actual opportunity. You move faster, make independent decisions without communication overhead, and exploit secondary loot zones squads ignore. The 30% figure is a baseline. Route discipline pushes it significantly higher.
The 500k Koen Benchmark: Is It Realistic?
Yes — but only when the math is structured correctly. Core formula: loot value must exceed 3x your loadout cost. Budget loadouts run 80,000–100,000 Koen, so your minimum extraction target is 300,000 Koen. Hit 500k+ once you know which containers to prioritize.
Gear Cost vs. Loot Value Breakdown
Optimal solo loadout sits around 88,000 Koen total:
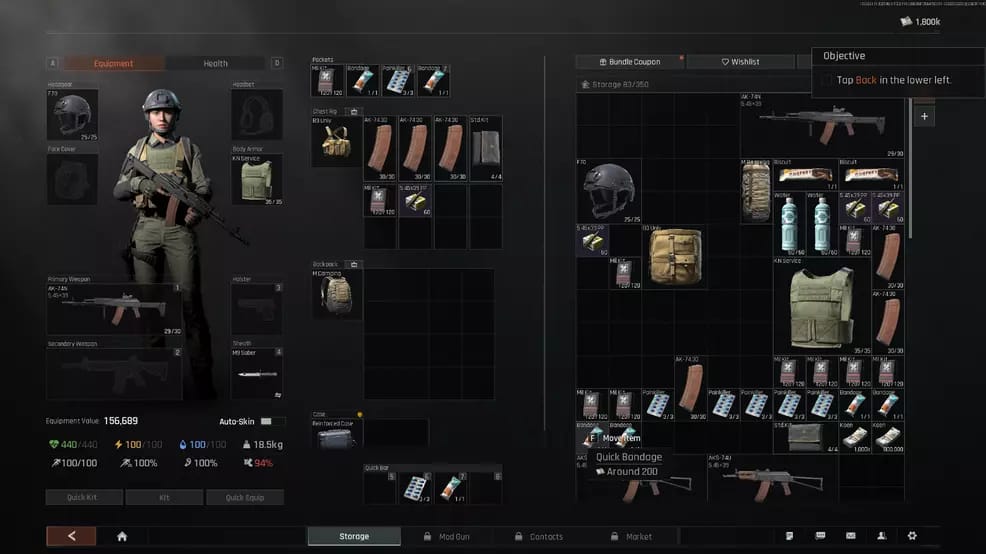
- MPX: 88,000 Koen, 850 RPM — effective close-to-mid range
- SEK Composite armor: 70 durability, -5% movement penalty
- M80 ammo: 441 penetration, 850.5 damage — general use
- M61 ammo: 714 penetration, 682.5 damage — swap in against armored opponents
This combination balances survivability against cost efficiency. Over-gearing (200,000+ Koen loadouts) requires 600,000+ Koen just to break even — most runs won't hit that threshold.
To keep your Koen reserves stocked before a major farming session, buy Arena Breakout bonds cheap through buffget — competitive pricing and fast delivery for Arena Breakout players.
What 500k Koen Looks Like in Your Backpack
High-value loot = items exceeding 5,000 Koen per inventory slot. In practice:
- Gold Pens: 450,000 Koen each — single highest-value portable item
- Gold Cups: 270,000 Koen each — second priority in any safe clear
- Two Gold Pens alone exceed the 500k target
Never fill your backpack with low-value items when high-value spawns remain unchecked. Koen-per-slot efficiency is everything.
Choosing the Right Map
Map selection impacts profitability more than loadout choice for most solo players.
Valley — Most Consistent for Solo
Valley Beach Villa contains 2 safes and 10 weapon crates, generating 300,000–500,000 Koen per assault. The layout supports perimeter routing that avoids central squad convergence zones. With 20-player capacity it's competitive, but secondary buildings are consistently underutilized by squads chasing main objectives.
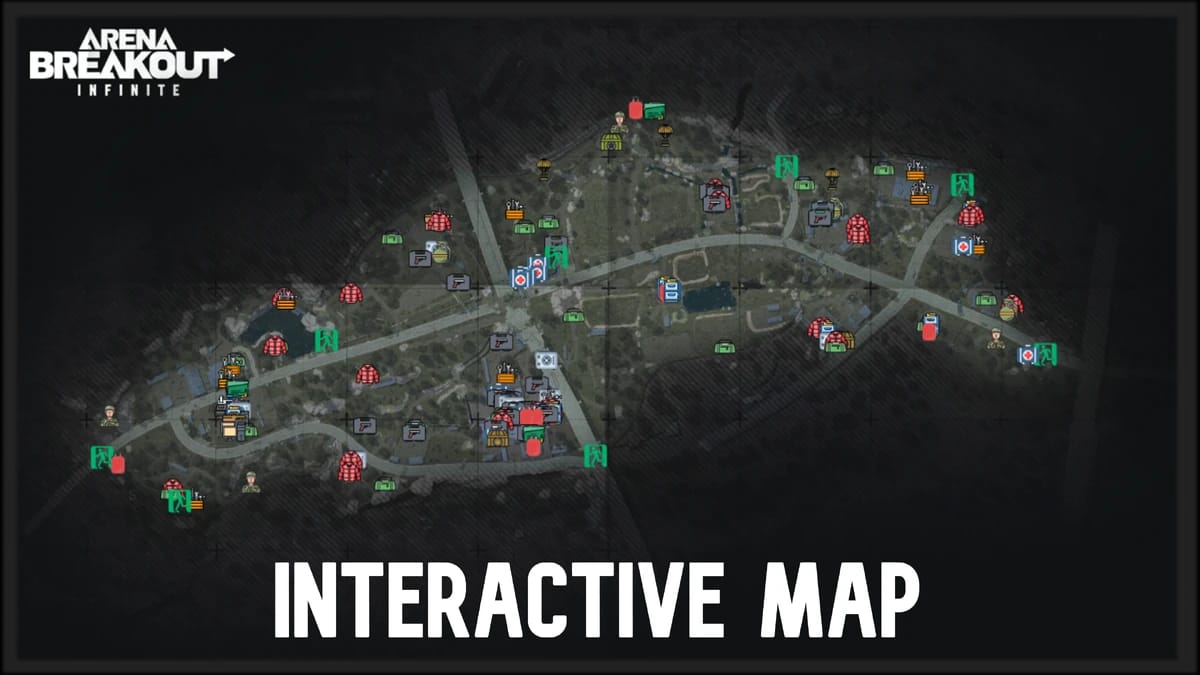
Northridge — Highest Ceiling, Highest Risk
Northridge Hotel holds 8 safes — the highest concentration of any single location in the game. Successful clears yield 500,000–800,000 Koen. The tradeoff: it's a known squad magnet. Approach only after confirming squad positions through audio cues and mini-map awareness.
Farm — Most Reliable, Lowest Competition
Farm's 12-player cap makes it the lowest-competition Lockdown map. Key locations:
- Farm Motel: 3 locked safes, 200,000–400,000 Koen per clear
- Stables: 1 safe
- Grain Trade Center: 1 locked safe
- Sewage Plant: 3 safes
- Cable Car Station: 3 safes
Best choice for players still building solo routing discipline.
The 3 Safest Solo Loot Routes (Step-by-Step)
Route A: Valley Perimeter Loop — Low Encounter, High Consistency
- Drop at the map edge, away from Beach Villa's main entrance

- Clear all 10 weapon crates at Valley Beach Villa via the rear approach
- Open both safes — prioritize Gold Pens and Gold Cups over bulk items
- Move along the perimeter toward secondary buildings, avoiding the central road
- Crouch-walk throughout — reduces your audio output by 60% vs. standard movement
- Extract via Southern Blockade (2,000 Koen) once backpack value exceeds 3x loadout cost
Route B: Farm Secondary Sweep — Mid-Risk, Mid-Reward
- Enter Farm targeting Motel as primary objective
- Clear all 3 locked safes at Farm Motel before moving anywhere else
- Sweep Stables (1 safe) and Grain Trade Center (1 locked safe) as secondary stops
- Use Sewage Plant's 3 safes as tertiary target only if the timer allows
- Extract via the lowest-cost available point once inventory is 70% full of high-value items
Route C: Northridge Hotel Speed Clear — High Reward, Disciplined Exit
- Approach Northridge Hotel from a non-primary entry point
- Systematically clear all 8 safes — prioritize upper floors where squad traffic is lower
- Grab Gold Pens and Gold Cups first
- Exit the hotel before the mid-raid timer — that's when squads rotate toward Northridge
- Extract via Dam Sluice Gate (activate second-floor console first) to avoid contested points
Choosing Your Route by Server Timing
- Early raid (first 5 minutes): Route C — squads still rotating, Northridge briefly accessible
- Mid-raid: Route A — Valley perimeter quietest while squads engage primary objectives
- Late raid: Route B — Farm secondary buildings abandoned, locked safes accessible with minimal competition
To keep your loadout inventory ready between runs, top up Arena Breakout global pass at buffget for secure transactions and reliable delivery.
High-Value Loot Priorities
Always collect:
- Gold Pens: 450,000 Koen per unit
- Gold Cups: 270,000 Koen per unit
- High-tier weapon components and medical supplies as backfill
Leave behind:
- Anything below 5,000 Koen per slot when backpack is 50%+ full
- Bulk ammo beyond immediate combat needs
- Low-tier armor pieces under the 5,000 Koen-per-slot threshold
Container priority hierarchy:
- Locked safes — highest consistent value density
- Standard safes
- Weapon crates (Valley Beach Villa's 10 crates are the exception)
- General containers as backfill only
Solo Survival Tactics
Sound Discipline
Crouch-walking reduces your audio output by 60% compared to standard movement. Opponents moving normally are broadcasting their position while you stay acoustically invisible. Always crouch-walk inside buildings and near high-value loot zones — this isn't a minor edge, it's a core mechanic.
Movement Patterns That Minimize Squad Exposure
- Avoid central roads and primary building entrances — squad transit corridors
- Use building interiors for movement over open ground
- Change direction unpredictably when crossing open areas
- Never loot the same building twice in one run — it signals your pattern to observant opponents
When to Ghost, Engage, or Extract
Default to ghosting in 90% of squad encounters. The math is simple: solo vs. full squad is a structural disadvantage regardless of skill. Extract immediately if you hear multiple footsteps converging on your position and you're already carrying 300,000+ Koen. A guaranteed 300k extraction beats a contested 600k attempt that ends in death.
Budget Loadout: Don't Kill Your Profit Margin
Over-gearing is the most common intermediate mistake. Keep total loadout cost between 80,000–100,000 Koen:
- Primary: MPX — 88,000 Koen, 850 RPM
- Armor: SEK Composite — 70 durability, -5% movement penalty
- Ammo: M80 (850.5 damage, 441 penetration) general use; M61 (682.5 damage, 714 penetration) vs. armored opponents
- Backpack: Maximum capacity within budget — loot capacity sets your run ceiling
The 30,000 Koen minimum gear requirement means you can't enter under-equipped, but staying under 100,000 Koen total maintains a viable profit margin on every run.
Extraction Strategy
Know Every Exit Before You Drop
Memorize all extraction options for your map. Costs and conditions vary significantly — Southern Blockade (2,000 Koen), standard Lockdown extraction (6,000 Koen), Valley Helipad (2 dogtags), Dam Sluice Gate (second-floor console activation). Always have a primary and backup exit planned. Panic decisions during contested late-raid scenarios are how 400k runs become zero.
The 70% Inventory Rule
Extract when your backpack is 70% full of items exceeding 5,000 Koen per slot. Don't keep looting low-value items while carrying a backpack already worth 400,000+ Koen. The marginal value of additional looting rarely justifies the additional exposure time.
Emergency Extraction Protocol
Squad pursuit detected? Move immediately to your pre-planned extraction point. Drop any items below 10,000 Koen per slot to reduce encumbrance if needed. A clean 300,000 Koen extraction always beats a contested run ending in full gear loss.
Post-Run Checklist
Deke Vinson's inventory resets every 2 hours, with a daily reset at 10 PM PST. Time loot sales around these resets to optimize realized Koen value. Target metric: 300,000+ Koen profit per raid, with total loot value exceeding 3x loadout cost. Track this across runs to identify which routes are outperforming for your playstyle.
Post-extraction sell priority:
- Gold Pens and Gold Cups — highest value, fastest to sell
- High-tier weapon components
- Medical supplies
- Remaining items above 5,000 Koen per slot
- Discard or store anything below threshold
Pro tip: Reinvest no more than 30% of a successful run's profit into the next loadout. Maintain a Koen reserve of at least 3–4 loadout costs to absorb losing runs without disrupting your farming rhythm.
FAQ
Q: What is Lockdown Mode in Arena Breakout? High-stakes extraction format requiring level 14, 30,000 Koen minimum gear value, and 5,000 Koen entry fee. Features higher loot density, more players per map, and multiple extraction types with varying costs and conditions.
Q: Can you realistically make 500k Koen solo in one run? Yes. Northridge Hotel clears yield 500,000–800,000 Koen; Valley Beach Villa generates 300,000–500,000 Koen. With a sub-100k loadout and disciplined routing, 500k+ runs are achievable for intermediate players who prioritize high-value containers.
Q: Which map is best for solo Lockdown Mode? Valley for consistency — secondary building layout plus 10 weapon crates and 2 safes at Beach Villa. Farm for safety — 12-player cap, lowest competition. Northridge for highest ceiling — but requires experience to navigate safely.
Q: What's the best budget loadout for solo runs? MPX (88,000 Koen, 850 RPM) + SEK Composite armor (70 durability) + M80 ammo. Total cost: 80,000–100,000 Koen. Maintains the 3x loot-to-gear-cost profit ratio on most runs.
Q: How do you avoid squads while looting solo? Crouch-walk inside all buildings (60% audio reduction). Route through perimeter and secondary buildings. Default to ghosting over engagement. Extract immediately if squad pursuit is detected and you're already carrying 300,000+ Koen.
Q: When should you extract early? When your backpack is 70% full of items exceeding 5,000 Koen per slot — or immediately upon detecting squad pursuit if you're carrying 300,000+ Koen. The 6,000 Koen extraction cost is negligible against a secured 300k–500k haul.