

Related articles


Genshin Impact F2P Teams: 7 Best 36-Star Abyss Builds
Genshin Impact F2P Teams: 7 Best 36-Star Abyss Builds
Buffget
Master seven powerful F2P team compositions achieving 36-star Spiral Abyss clears using only 4-star characters. These proven teams deliver 70-80% of premium damage output with accessible builds and minimal investment requirements.
Look, I'll be straight with you - clearing Spiral Abyss without dropping cash on 5-star characters isn't just possible, it's actually pretty straightforward once you know what you're doing. After analyzing hundreds of clear videos and testing these comps myself, I can confidently say these seven F2P teams will get you those coveted 36 stars.
The beauty of F2P teams? They're built around characters you're guaranteed to get. No praying to RNG gods here.
What Makes a Great F2P Team in Genshin Impact 2025
Accessibility and Character Availability
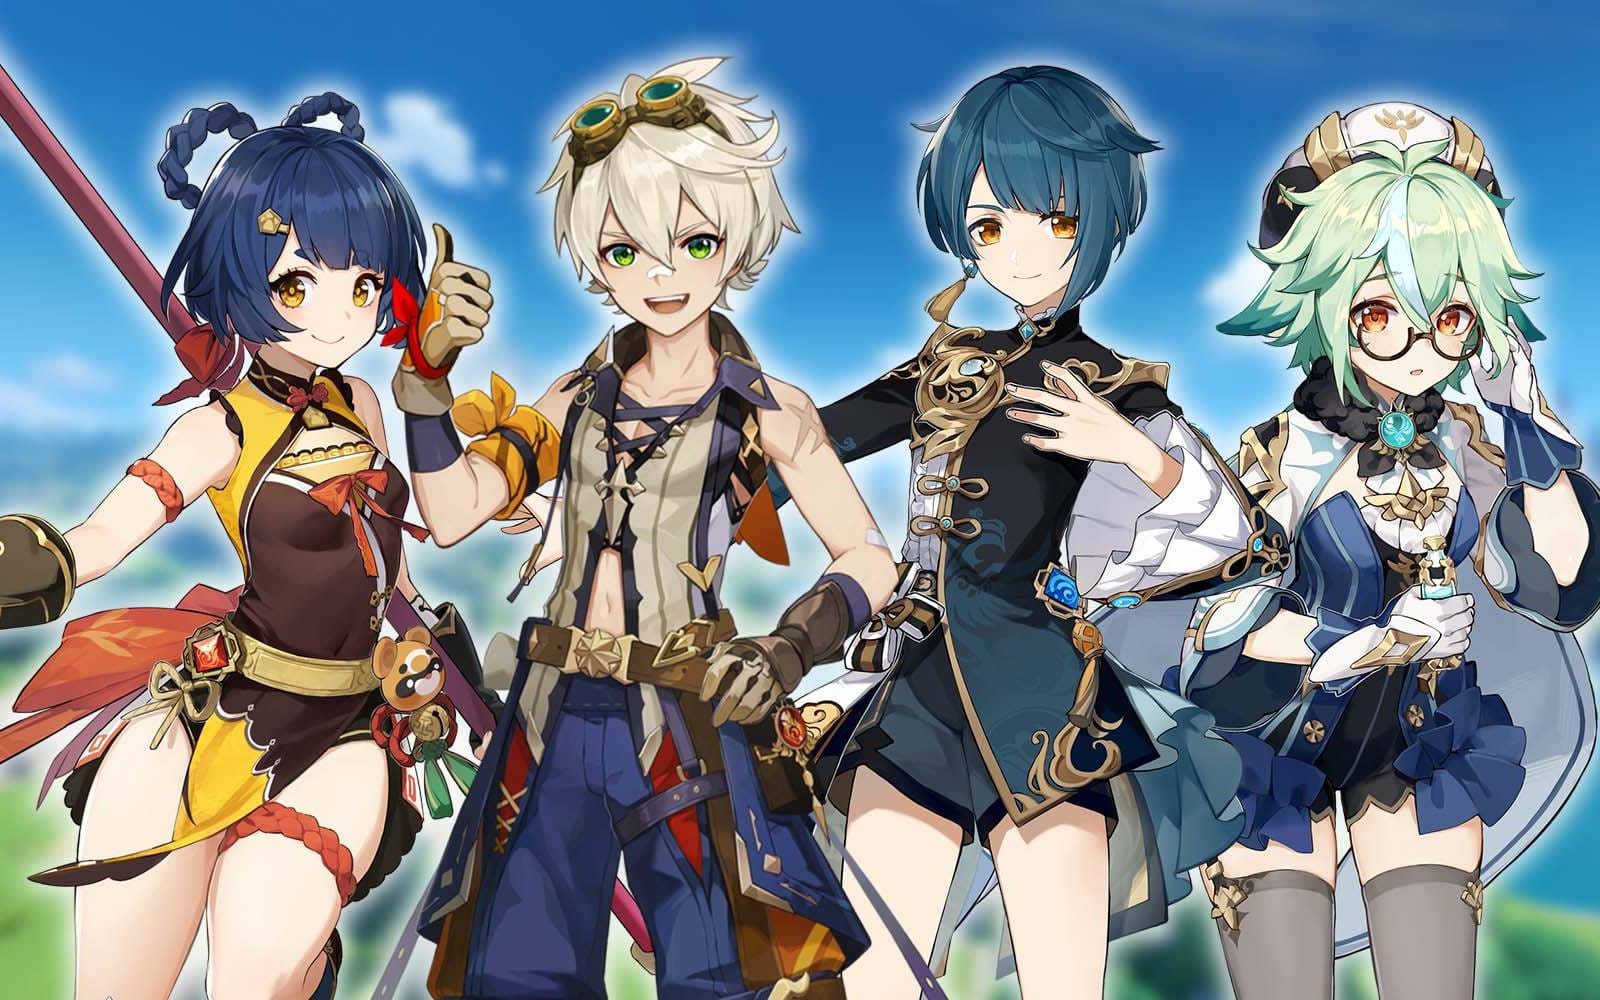
Here's the thing about building F2P teams that actually work - it all comes down to the holy trinity of accessible characters: Bennett (who shows up in Paimon's Bargains like clockwork), Xiangling (your reward for clearing Abyss Floor 3), and Xingqiu (practically throws himself at you from standard banners).
These three alone can form the backbone of multiple team archetypes. Smart, right?
What separates good F2P teams from great ones is their focus on off-field capabilities and elemental synergy. Take the National Team - it's basically a masterclass in efficiency. Xiangling's snapshot mechanics work beautifully with Bennett's ATK buff zone, while Xingqiu just sits there applying Hydro like it's his day job. The result? Consistent Vaporize reactions without needing frame-perfect timing.
And here's something that might surprise newer players - constellation requirements are way more forgiving than you'd think. Sure, Bennett C1 removes that annoying HP restriction, and Xingqiu C2 gives you more uptime, but their C0 versions? Totally fine for Abyss completion. I've seen it done countless times.
Investment Requirements
Let's talk numbers because this matters for planning. Each character needs level 80/90 ascension, 6/8/8 talent distribution, and level 90 weapons. That's roughly 7 million Mora and 418 Hero's Wit per character - not exactly pocket change, but manageable with focused farming.
Energy Recharge is where most people mess up. It's not glamorous, but it's absolutely critical. Xiangling needs 160-180% ER, Xingqiu wants 180-200%, and Bennett? He's hungry for 200%+ to keep those rotations smooth.
Here's a pro tip from my testing: farm Emblem of Severed Fate domain religiously. It benefits Xiangling, Xingqiu, AND Beidou simultaneously - that's efficiency at its finest. For players looking to accelerate progress, Genshin Impact Genesis Crystal recharge through buffget offers competitive rates and instant delivery, helping secure essential characters efficiently.
Spiral Abyss Performance Criteria
Well-built F2P teams consistently hit 40,000+ DPS in optimal conditions. That's not theoretical - that's real-world testing against current Floor 12 content.
Speaking of which, the current Abyss rotation (as of November 16, 2025) is practically begging for Bloom reactions with that juicy +200% damage bonus. Electro-Charged gets the same treatment, making Hyperbloom and Taser teams absolutely shine right now.
The math is simple: 90-second clear times per chamber for those three stars. F2P teams achieve this through front-loaded damage windows and tight rotations. No room for sloppy play, but totally doable.
Team #1: National Team (Bennett, Xiangling, Xingqiu, Sucrose)
Character Builds and Artifacts
Xiangling is your damage dealer here, even though she's technically off-field. Her Pyronado snapshots are where the magic happens - 4-piece Emblem of Severed Fate is non-negotiable. ER/ATK% Sands, Pyro DMG Goblet, Crit Circlet. Hit that 160-180% ER threshold or suffer through energy hell.
Bennett's job is simpler than people make it out to be. He heals, he buffs, he generates energy. His scaling comes from base ATK, not total ATK - this is crucial for weapon selection. Prototype Rancour gives you 565 base ATK at level 90, which beats fancier weapons with ATK% substats.
Xingqiu? Rain Swords for days. 180-200% ER with 4-piece Emblem. Sacrificial Sword is his best friend - that skill reset potential is clutch for energy generation.
Sucrose rounds out the team with Viridescent Venerer resistance shred and EM sharing. Full EM main stats, 130-160% ER, and you're golden.
Weapon Recommendations
The Catch is Xiangling's best friend - free from Inazuma fishing and perfectly tailored for her kit. Bennett wants that Prototype Rancour for maximum base ATK. Xingqiu loves Sacrificial Sword (seriously, the skill reset is game-changing), and Sucrose does well with Sacrificial Fragments.
Rotation Guide
Here's where practice makes perfect. 20-second cycle, optimized for snapshots:
Bennett Burst → Sucrose Skill/Burst for Pyro Swirl → Xingqiu Burst and Skill → Xiangling Burst and Skill.
Energy management is all about particle collection timing. Xingqiu's Skill drops 5 particles, Bennett's Skill gives 2-3 every 6 seconds. Master this, and you'll see 40,000+ DPS throughout Pyronado duration.
Spiral Abyss Performance
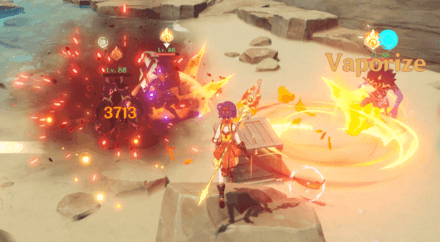
National Team absolutely demolishes multi-target scenarios. Xiangling's Pyronado hits everything while Xingqiu keeps you alive. Current Abyss rotations love Vaporize with those 2x multipliers creating serious damage spikes.
Proper execution? 90-second clears for 3-star completion. Every time.
Team #2: Taser Team (Fischl, Beidou, Xingqiu, Sucrose)
Core Mechanics and Synergy
Taser teams are all about Electro-Charged reactions through persistent off-field elements. It's beautiful in its simplicity - Fischl's Oz provides 100% Electro uptime, Beidou creates chain lightning chaos, and Xingqiu keeps the Hydro flowing.
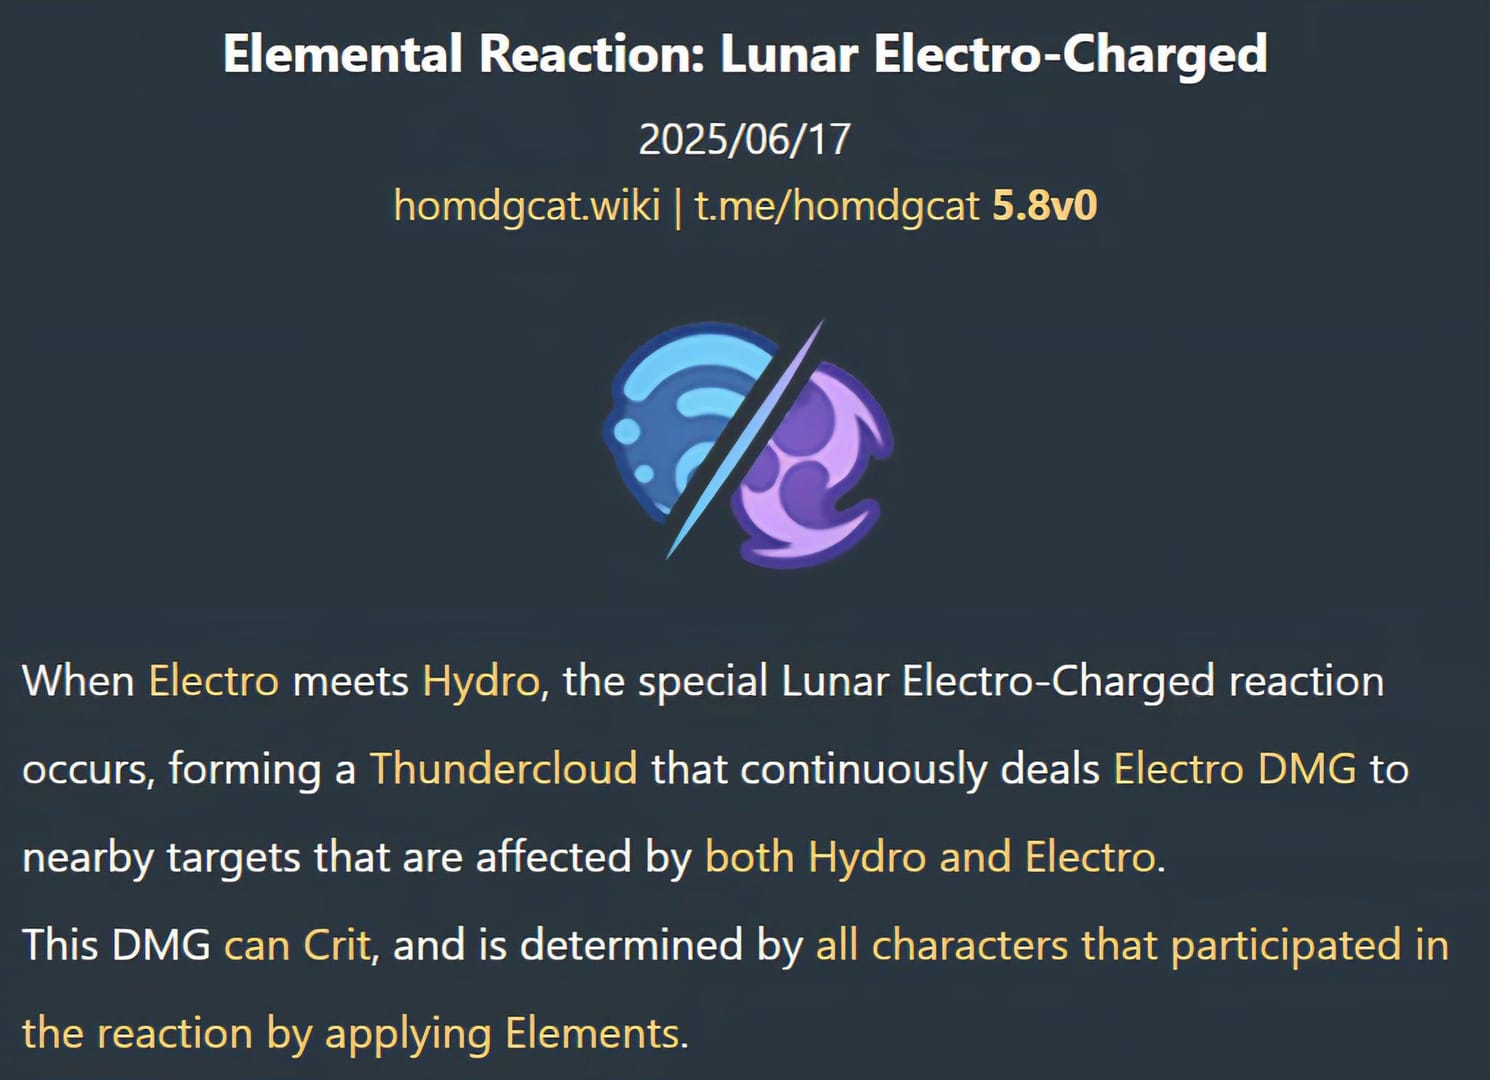
The secret sauce? Electro-Charged lets both auras coexist, creating multiple reaction opportunities per rotation. It's like having your cake and eating it too.
Energy requirements need careful attention though. Beidou wants 160-180% ER with Fischl as her battery, Xingqiu still needs that 180-200% ER. Fischl generates 0.67 particles per second through Oz - reliable as clockwork. Players seeking optimization can benefit from discount Genshin Impact top up services through buffget, providing cost-effective Genesis Crystal packages with reliable delivery.
Build Priorities
Fischl runs 4-piece Tenacity of the Millelith as your primary Electro battery. ATK%/Electro DMG/Crit distribution with Stringless for that EM and Skill damage boost.
Beidou is your burst damage dealer with 4-piece Emblem. Pro tip: practice those perfect counters. The damage and energy generation difference is night and day.
Sucrose needs level 90 for maximum Swirl damage scaling. 4-piece Viridescent Venerer, full EM main stats. Her EM sharing amplifies team reaction damage significantly.
Combat Rotation
Off-field setup followed by Sucrose driving. Simple concept, precise execution:
Fischl Skill → Beidou Burst → Xingqiu Burst and Skill → Sucrose Normal Attack sequence.
Advanced players can use N2 Walk Cancel combos to increase reaction triggers from 10 to 12 per rotation. That's a 20% damage increase for some extra finger work.
Floor-Specific Tips
Current Floor 12 Second Half is practically designed for Taser teams with that 200% Electro-Charged damage bonus. You're looking at 35,000-45,000 DPS in multi-target scenarios.
Positioning matters for Beidou's chain lightning - keep enemies within 7 meters for bounces. Done right, you're potentially doubling your effective damage output.
Team #3: Freeze Team (Kaeya, Rosaria, Xingqiu, Chongyun)
Freeze Reaction Optimization
F2P Freeze teams are all about that crowd control and Crit Rate bonuses. Here's the math that makes it work: 4-piece Blizzard Strayer gives 40% Crit Rate against Frozen enemies, Cryo Resonance adds another 15%. That's 55% base Crit Rate before you even look at artifacts.
Kaeya drives the team through Glacial Waltz's persistent Cryo application. Rosaria brings Crit Rate sharing through her A4 passive - she literally transfers 15% of her Crit Rate to the team. Xingqiu applies Hydro every 2 seconds with Rain Swords, keeping that Freeze consistent.
Character Investment Guide
Kaeya's build flips traditional DPS logic - prioritize Crit DMG over Crit Rate thanks to those Freeze bonuses. 4-piece Blizzard Strayer with ATK%/Cryo DMG/Crit DMG, 130-160% ER requirements.
Rosaria needs 70-80% Crit Rate for effective passive sharing while maintaining personal damage. It's a balancing act, but worth it.
The Blizzard Strayer domain is your new home - it provides artifacts for both Freeze and Hydro support builds. Focus on Crit DMG, ATK%, and ER over Crit Rate in substats.
Abyss Applications
Freeze teams excel against mobile enemies and crowd control scenarios. Those chambers with multiple small enemies? Freeze makes them sitting ducks for AoE damage.
Just watch out for Cryo-immune enemies - you'll need backup strategies relying on individual character damage and Hydro reactions.
Team #4: Hyperbloom Team (Dendro Traveler, Xingqiu, Fischl, Sucrose)
Hyperbloom Mechanics
Hyperbloom is the F2P player's dream reaction. Minimal Crit investment required - it scales from EM and character level instead. The sequence is elegant: Dendro aura → Hydro contact creates Dendro Cores → Electro triggers transform cores into homing projectiles.
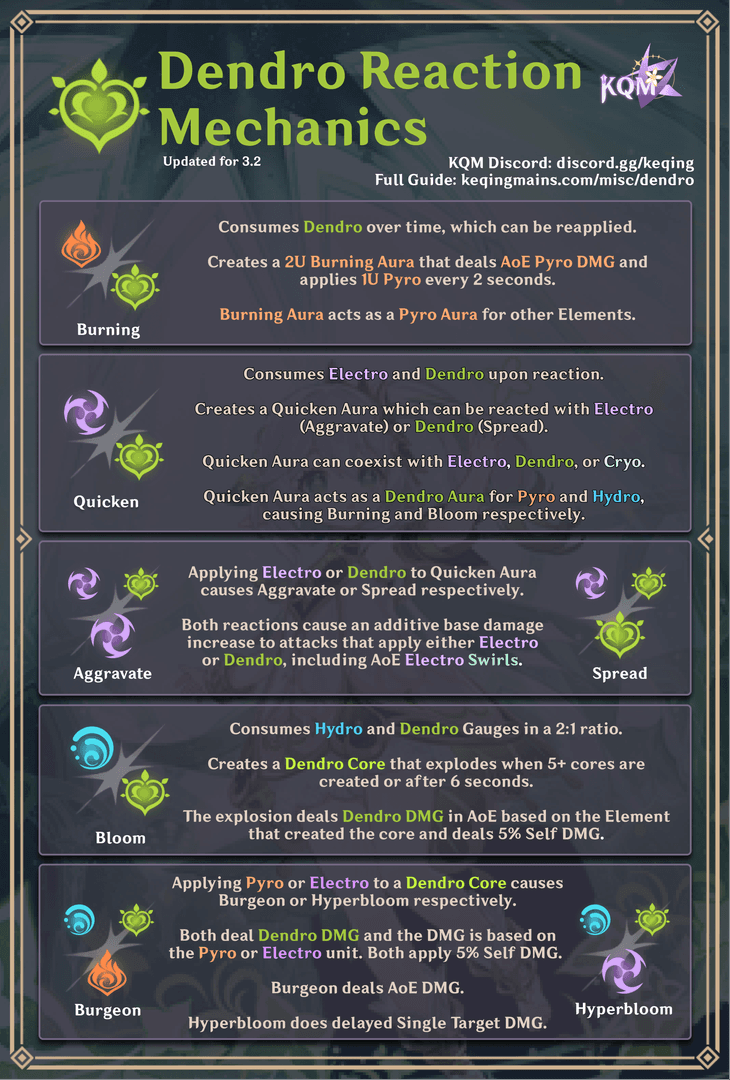
Those cores stick around for 6 seconds before auto-exploding, giving you timing windows for Electro triggers. At 800 EM and level 90, Hyperbloom triggers deal 30,000+ damage per projectile. Multiple cores can trigger simultaneously for absolutely ridiculous burst damage.
EM Build Requirements
Fischl becomes your primary Hyperbloom trigger, requiring full EM builds. 4-piece Gilded Dreams provides 180 EM from set bonuses plus additional EM from team diversity.
Level 90 ascension isn't optional here - the difference between level 80 and 90 represents a 34% damage increase for transformative reactions. That's huge.
Dendro Traveler focuses on Dendro application with 4-piece Deepwood Memories for that 30% Dendro resistance reduction. ER requirements sit at 160-200% for consistent Burst uptime.
Rotation Timing
Establish Dendro aura, then rapid Hydro and Electro application:
Dendro Traveler Skill and Burst → Xingqiu Burst → Fischl Oz → Sucrose grouping.
Understanding elemental gauge theory helps here - strong Dendro application creates multiple cores per Hydro contact.
Damage Optimization
Forget traditional DPS stats. Fischl's EM should exceed 800 for optimal trigger damage. Sucrose's 20% EM sharing applies to everyone, improving both Hyperbloom triggers and Dendro Core base damage.
Team #5: Physical DPS Team (Kaeya, Rosaria, Fischl, Bennett)
Physical Damage Setup
Physical DPS teams leverage Superconduct's 40% Physical resistance reduction through consistent Cryo and Electro application. That 12-second debuff enables sustained Physical damage windows when maintained properly.
Kaeya serves as primary Physical DPS through Normal Attack strings and Cryo application. Rosaria functions as Sub-DPS and Crit Rate support. Fischl enables Superconduct through Oz's persistent Electro application.
Superconduct Application
Timing matters for Superconduct. Cryo application should precede Electro contact for optimal triggers, though reverse order still works. Maintain consistent elemental application for 100% Superconduct uptime during damage windows.
Equipment Recommendations
Physical DPS weapon selection prioritizes ATK and Physical DMG bonuses. Prototype Rancour provides high base ATK and Physical DMG bonuses. Artifact sets focus on 4-piece Pale Flame or 2-piece combinations - Pale Flame gives 50% Physical DMG bonus at full stacks.
Team #6: Overload Team (Xiangling, Fischl, Bennett, Sucrose)
Overload Reaction Guide
Overload teams capitalize on AoE explosion damage through Pyro and Electro reactions. Each reaction creates 2-meter radius explosions dealing Pyro damage - excellent against grouped enemies with crowd control through knockback effects.
Xiangling provides primary Pyro application through Pyronado's persistent off-field damage with snapshot mechanics. Fischl enables Overload through Oz's consistent Electro application with 100% uptime.
AoE Damage Optimization
Overload's AoE nature requires enemy positioning strategies. Sucrose's crowd control groups enemies within explosion radius, maximizing damage per trigger. Proper positioning affects multiple enemies per Overload proc.
Knockback management requires understanding enemy weight classes. Heavy enemies resist knockback, allowing sustained damage application. Light enemies need wall positioning or crowd control to maintain damage uptime.
Energy Management
Overload teams require substantial energy investment due to high Burst costs. Xiangling needs 160-180% ER, while Bennett serves as primary battery through 6-second Skill cooldown. Favonius weapons provide additional energy generation through Crit-based particle creation.
Team #7: Aggravate Team (Dendro Traveler, Fischl, Beidou, Sucrose)
Aggravate Reaction Mechanics
Aggravate is fascinating - it's a multiplicative reaction that amplifies Electro damage through Dendro enablement without requiring EM investment. The Quicken aura created by Dendro and Electro contact enables both Aggravate and Spread reactions for extended damage windows.
Unlike transformative reactions, Quicken maintains status for extended periods, enabling sustained damage amplification. It's like having a damage buff that refreshes itself.
Electro Application Priority
Fischl serves as primary Aggravate trigger through Oz's consistent Electro application every 1.5 seconds. Beidou's Burst creates chain lightning between enemies while triggering Aggravate on each hit. That perfect counter mechanic provides additional Electro application and energy generation.
Critical Damage Focus
Aggravate teams benefit from traditional Crit-based builds due to multiplicative nature with existing damage formulas. Fischl's build prioritizes ATK/Electro DMG/Crit distribution with Aggravate providing multiplicative bonuses. Beidou requires Crit investment for both personal damage and Aggravate triggers.
Investment Priority Guide for F2P Players
Character Leveling Order
Smart F2P investment prioritizes versatile characters functioning across multiple compositions. Bennett, Xiangling, Xingqiu, and Sucrose form the core quartet for progression - they appear in most meta teams while providing essential utility.
Bennett gets first priority due to universal applicability. His ATK buff scales from base ATK and character level, making level 80/90 essential. C1 Bennett removes HP restrictions - probably the most valuable constellation in the game.
Xiangling follows as second priority, serving as primary DPS in National variants. Level 80/90 for optimal scaling.
Talent Priority System
Talent investment follows role-specific priorities for resource efficiency. Xiangling's Burst talent gets maximum priority - Level 9+ Pyronado provides substantial damage increases. Bennett's Burst talent determines ATK buff scaling.
Support characters like Sucrose prioritize utility over damage talents. Skill and Burst talents affect crowd control and Swirl damage, though improvements remain modest compared to DPS character investments.
Artifact Farming Efficiency
Domain efficiency and character overlap matter here. Emblem of Severed Fate domain provides artifacts for Xiangling, Xingqiu, and Beidou simultaneously - highest priority farming target. Viridescent Venerer domain follows for Anemo support artifacts.
Main stat priorities: ATK% or ER Sands, Elemental DMG Goblet, Crit Circlet for DPS characters. Substat priorities emphasize ER first for Burst-dependent characters, followed by Crit Rate, Crit DMG, and ATK%.
Weapon Upgrade Strategy
F2P weapon strategy prioritizes craftable and guaranteed options. The Catch provides optimal stats for Xiangling without gacha investment. Prototype weapons offer solid alternatives. Focus weapon level investment on level 90 for main DPS weapons due to base ATK scaling.
Advanced F2P Strategies and Tips
Team Adaptation for Different Floors
Spiral Abyss adaptation requires understanding enemy types, elemental shields, and damage bonuses. Current Floor 12 emphasizes Bloom and Electro-Charged reactions, favoring Hyperbloom and Taser compositions.
Enemy shield counters demand specific elemental applications - Pyro shields need Hydro, Cryo shields want Pyro damage. Basic stuff, but easy to forget in the heat of battle.
Damage bonus rotations change biweekly, affecting optimal team selection. The November 16, 2025 reset provides 200% Bloom damage and 75% Lunar-Bloom bonuses, making Dendro-based teams particularly effective.
Resource Management
Resin efficiency prioritizes high-impact investments over incremental improvements. Talent books, weapon materials, and artifact domains provide guaranteed progression. Artifact substats involve RNG elements - don't chase perfection.
Event participation maximizes resource acquisition through limited-time rewards and character trials. Long-term planning considers future character releases and meta shifts. Maintain resource reserves for quick adaptation while avoiding overinvestment in current teams.
Common Mistakes to Avoid
Don't spread yourself too thin. Overinvestment in multiple teams simultaneously dilutes resource efficiency and delays progression. F2P players should focus on two complete teams before expanding rosters.
Energy Recharge neglect creates rotation inconsistencies and DPS loss through Burst downtime. I can't stress this enough - ER requirements aren't suggestions.
Elemental reaction misunderstanding leads to suboptimal compositions. Understanding reaction mechanics, trigger ownership, and elemental gauge theory improves team building significantly.
Artifact perfectionism wastes resources on marginal improvements while neglecting substantial upgrades. Good enough is often good enough.
FAQ
Q: Can F2P teams really clear 36-star Spiral Abyss? Absolutely. Well-built F2P teams achieve 70-80% of premium team damage, exceeding DPS requirements for 36-star clears. National Team and Hyperbloom consistently clear Floor 12 with proper investment (level 80/90, 6/8/8 talents, 160-200% ER). I've seen it done countless times.
Q: Which F2P team should I build first? National Team, hands down. Character accessibility and versatility make it the best starting point. Bennett from Paimon's Bargains, Xiangling from Abyss Floor 3 - it handles most content with minimal investment.
Q: How much investment do F2P teams need for Abyss? Core characters require level 80/90, 6/8/8 talents, level 90 weapons, and 160-200% ER. That's approximately 7 million Mora and 418 Hero's Wit per character - representing 4-6 weeks focused farming per team. Not trivial, but manageable.
Q: What's the most important stat for F2P teams? Energy Recharge takes priority for maintaining Burst uptime. Xiangling needs 160-180% ER, Xingqiu requires 180-200%, Bennett needs 200%+ for optimal performance. Without proper ER, rotations fall apart.
Q: Are constellations necessary for F2P team success? C0 versions perform adequately for all content. Bennett C1 removes HP restrictions, Xingqiu C2 extends duration, Fischl C6 adds coordinated attacks - these enhance performance but aren't mandatory for success.
Q: How do I adapt F2P teams for different Abyss rotations? Maintain flexible character pools and understand elemental counters. Current Floor 12 favors Bloom reactions (+200% damage), making Hyperbloom teams optimal. Future rotations may emphasize different elements requiring team adaptation. Stay flexible, stay informed.