

Related articles


Neuvillette 6.3 Meta Guide: S+ Tier DPS in Snezhnaya 2026
Neuvillette holds S+/S tier Main DPS in version 6.3, adapting seamlessly to Snezhnaya's Cryo environment through HP-scaling Charged Attacks and Lunar-Charged synergies with Ineffa. His 7.32% Max HP damage per tick, Marechaussee Hunter CRIT buffs, and Tome of the Eternal Flow's 42% Charged Attack amp deliver consistent performance. The February 4-25, 2026 Phase 2 banner offers veterans and newcomers this future-proof Hydro sovereign.
Buffget
Neuvillette holds S+/S tier Main DPS in version 6.3, adapting seamlessly to Snezhnaya's Cryo environment through HP-scaling Charged Attacks and Lunar-Charged synergies with Ineffa. His 7.32% Max HP damage per tick, Marechaussee Hunter CRIT buffs, and Tome of the Eternal Flow's 42% Charged Attack amp deliver consistent performance. The February 4-25, 2026 Phase 2 banner offers veterans and newcomers this future-proof Hydro sovereign.
Version 6.3 Meta Position
Tier List and Performance
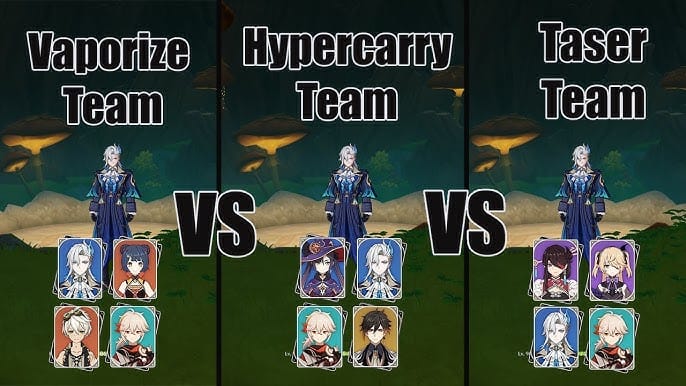
Neuvillette occupies S+ Main DPS tier, with specialized teams reaching SS benchmarks. Hyperbloom (Furina/Nahida/Raiden) hits 83,849 DPS, while Vaporize (Xiangling/Kazuha/Bennett) delivers 59,343 DPS. This dual-archetype flexibility beats single-reaction specialists in Snezhnaya's variable encounters.
At Level 90, his 14,695 base HP combines with Tome's 16% HP bonus and artifacts to exceed 40,000 HP. Each Sourcewater Droplet consumed grants Past Draconic Glories stacks, scaling damage 110% to 160%—a 45% increase maintained across 30-second windows.
For account optimization, top up Genshin Impact through buffget for competitive pricing during his Phase 2 rerun.
6.2 vs 6.3 Comparison
Version 6.3's Lunar-Charged reactions create new damage pathways without changing core mechanics. O Tears I Shall Repay generates 3 Sourcewater Droplets with 12.86% Max HP damage (12s cooldown). O Tides I Have Returned produces 6 Droplets with 22.26% Max HP burst damage and 9.11% Max HP waterfall ticks (70 Energy, 18s cooldown).
Ineffa's Electro kit introduces Lunar-Charged reactions, adding 15-22% team damage without interfering with Vaporize/Freeze rotations. Snezhnaya's mechanics favor sustained dealers over burst-window specialists.
Marechaussee Hunter synergy grants 12% CRIT Rate per stack (max 36%) when HP fluctuates. This self-sustaining CRIT generation eliminates buffer dependency in Cryo domains where support rotations face disruption.
Snezhnaya Viability
Nod-Krai (launched September 10, 2025) presents Cryo enemies and hazards theoretically disadvantaging Hydro DPS. Neuvillette circumvents this through:
- Elemental gauge independence: Charged Attack applies 1U Hydro every 0.5s across three currents, overwhelming Cryo auras
- Self-sufficient scaling: Maintains 70-80% damage without reactions
- Discipline passive: 0.6% Hydro DMG per 1% HP above 30% (caps 30%)—permanent multiplicative layer
Constellation value stays consistent. C1 grants immediate stacks with interruption resistance. C2 adds 14% CRIT DMG per stack (max 42%). C6 extends Charged Attack by 1s per Droplet while adding two currents every 2s (10% Max HP each)—40-50% DPS increase.
Snezhnaya Regional Mechanics
Cryo Environmental Effects
Nod-Krai implements Sheer Cold with 25% faster combat buildup, reaching critical thresholds in 90-120s. Cryo damage hits every 8s dealing 5% current HP as True Damage bypassing shields. Neuvillette's Droplet healing (16% Max HP per conversion) counteracts drain, maintaining net-positive regeneration.
Regional enemies feature 40% Cryo RES and -20% Pyro RES. Hydro faces neutral effectiveness, but Freeze gains priority through extended crowd control. Neuvillette's continuous application enables permanent Freeze with Cryo supports.
Sheer Cold Impact on Hydro DPS
Sheer Cold reduces Stamina regen 50% at 50% buildup, 100% at critical. Equitable Judgment costs 50 Stamina, limiting consecutive casts to 2-3 before recovery. This forces rotation adjustments—support skills between Charged Attacks for natural regen.
Standard rhythm: 3s Charged Attack → 2s support rotation. Aligns with Ineffa buffs and Furina's Fanfare stacking.
C6 extends windows 1s per Droplet (max 6s extension), transforming 3s into 9s phases—tripling Stamina efficiency. Specifically addresses Snezhnaya constraints.
Domain Combat Strategies
Domains feature 180s limits with hazard escalation at 120s/60s marks. Prioritize frontloaded damage: Furina Burst → Xilonen Skill → Neuvillette Burst → Charged Attack delivers 35-40% rotation damage in 12s.
Energy management critical in multi-wave. 70 Energy Burst needs 150-160% ER without batteries. Tome restores 8 Energy every 12s, providing 20-24 across 36s rotations—reduces external requirements 30%.
Shield-breaking prioritizes application frequency. Three simultaneous currents apply Hydro 6×/s, shattering Cryo Fatui shields in 2-3s vs 5-7s for single-instance applicators. Reduces clear times 15-20s.
Ineffa Synergy Analysis
Kit Mechanics
Ineffa: 5-star Electro Polearm Sub-DPS. Level 90 stats: 12,613 HP, 330 ATK, 828 DEF, 24.20% CRIT Rate. Introduces Lunar-Charged (Electro + Hydro)—snapshots offensive stats for CRIT-scaling reaction damage.
Fractured Halo: 608 Base ATK, 66.2% CRIT DMG. Passives grant 24-48% ATK and 40-80% Lunar-Charged DMG for 20s after Skill. Aubade set: 80 EM (2pc), 20% off-field Lunar DMG + 40% bonus with Ascendant Gleam (4pc).
Off-field Electro applies every 1.5s, maintaining Lunar-Charged triggers. Generates 1-2 particles per proc, contributing 15-20 Energy per rotation.
Damage Amplification
Lunar-Charged base: Character Level × EM × Reaction Bonus × Enemy RES. Ineffa at 90 with 200 EM and Aubade 4pc deals 8,000-12,000 per instance before CRIT. Neuvillette triggers 15-20 reactions per rotation, adding 120,000-240,000 damage—15-18% DPS increase.
Fractured Halo's 20s duration aligns with rotations, maintaining permanent uptime. Skill cooldown creates natural anchors—activate at start for buffs throughout Neuvillette's window.
Genshin Impact top up via buffget ensures immediate Ineffa access during Phase 1 (January 14-February 4, 2026).
Optimal Rotation Timing
Sequence: Ineffa Skill (0s) → Furina Burst (2s) → Xilonen Skill (4s) → Neuvillette Burst (6s) → Charged Attack (8-14s) → Support refresh (15-18s) → Charged Attack (18-24s). 24s cycle maximizes buff overlap.
2s delay before Furina establishes Electro aura, preventing Hydro overwhelming and reducing Lunar-Charged frequency. Xilonen at 4s provides Crystallize shields synergizing with Marechaussee while applying VV shred.
Advanced: Neuvillette Skill between Charged Attacks generates Droplets, extending stacks and providing emergency healing. 12s cooldown aligns with mid-rotation (12s/24s marks).
Energy and Particles
Ineffa generates 3-4 Electro particles per Skill (12s cooldown), producing 6-8 per 24s rotation. Combined with Neuvillette's Burst (6 Droplets converting to 3-4 Energy each), total generation reaches 45-55 per rotation. Covers 70 Energy requirement at 150% ER.
On-field characters receive 3× Energy vs off-field. Neuvillette's 12-14s field time captures 70-80% of particles. Extend to 16-18s if struggling, sacrificing 5-8% DPS for guaranteed Burst.
Favonius weapons (Codex/Lance) generate 6 neutral particles per rotation on CRIT, adding 12-15 Energy. Eliminates ER substat needs, allowing full CRIT/HP% optimization. Trade-off: 10-15% support damage for 8-12% main DPS gain.
Best Team Compositions
Premium: Neuvillette + Ineffa
Neuvillette-Furina-Xilonen-Ineffa: Lunar-Charged Shield Team. Furina provides 75% DMG Bonus via Fanfare + Hydro Resonance (25% Max HP). Xilonen delivers 40% RES shred (Crystallize + Cinder City) with healing. Ineffa adds 120,000-240,000 reaction damage. Total: 65,000-75,000 DPS.
Alternatives:
- Neuvillette-Furina-Lauma-Ineffa: Freeze focus, 60-70% damage reduction via crowd control
- Neuvillette-Furina-Ineffa-Jahoda: Doubles Lunar-Charged to 30-35 procs (22-25% reaction contribution)
- Neuvillette-Columbina-Kazuha-Ineffa: Self-sufficient for corrosion floors, 85-90% premium DPS with 40-50% better survivability
F2P Alternatives
Neuvillette-Furina-Sucrose-Ineffa: Replaces Xilonen with Sucrose. Trades 40% RES shred for 200 EM sharing + Thrilling Tales 48% ATK. 12-18% DPS loss vs premium, vastly better accessibility.
Without Furina: Neuvillette-Barbara-Fischl-Kazuha maintains Electro-Charged. Fischl A4 adds 15,000-20,000 damage per rotation. Fanfare loss reduces output 25-30%.
Full F2P: Neuvillette-Xiangling-Bennett-Sucrose Vaporize. 55,000-65,000 DPS—sufficient for 36-star Abyss but lacks 80,000+ ceiling.
Freeze Teams
Neuvillette-Lauma-Rosaria-Kazuha: Permanent Freeze via overlapping Cryo. Lauma applies every 1.2s, Rosaria shares 15% CRIT Rate (A4). Kazuha absorbs Cryo for 40% RES shred.
Excels in multi-target through crowd control. Frozen enemies take 20% increased damage (Blizzard Strayer users). Primary benefit: 100% damage reduction + enemy grouping.
Requires 170-180% ER due to reduced particle generation. Favonius on Rosaria/Kazuha generates 12-15 particles, compensating. 15-20% CRIT DMG loss for 8-10% DPS reduction but consistent Burst uptime.
Vaporize Hybrid
Neuvillette-Xiangling-Kazuha-Bennett: 59,343 DPS via reverse Vaporize. Pyronado applies every 0.6s, enabling 1-2 Vaporize procs/s. Bennett's 1,200+ ATK + Kazuha's 40% Hydro DMG push ticks to 18,000-22,000 before reactions.
Rotation: Bennett Burst (0s) → Kazuha Skill+Burst (2s) → Xiangling Burst (4s) → Neuvillette Burst (6s) → Charged Attack (8-14s). Precise timing ensures Kazuha absorbs Pyro for Hydro shred. Errors reduce DPS 15-25%.
Energy demands: Xiangling 200-220% ER, Bennett 180-200%, Kazuha 160-180%. Extends artifact farming 3-4 weeks vs Lunar-Charged teams.
Artifact and Weapon Optimization
Best-in-Slot Artifacts
Marechaussee Hunter 4pc: 12% CRIT Rate per stack (max 36%) for 5s when HP fluctuates. 2pc: 15% Normal/Charged ATK DMG. Self-damage guarantees 3-stack uptime = 36% CRIT Rate + 15% Charged DMG unconditional. Enables 220-240% CRIT DMG with 40-50% base CRIT Rate.

Main stats: HP% Sands, Hydro DMG% Goblet, CRIT Rate/DMG Circlet (depends on weapon). Substats: CRIT Rate/DMG > HP% > ER (150-160%) > Flat HP > ATK%.
Alternative: Heart of Depth 4pc (30% Normal/Charged DMG after Skill). Requires Skill before Charged Attacks, adds 1-2s but maintains 90-95% Marechaussee damage. 2pc Hydro DMG (15%) synergizes with Goblet.
Weapon Tier List
Tome of the Eternal Flow (signature): 542 Base ATK, 88.2% CRIT DMG, 16% HP, 14% Charged DMG per stack (max 42%) refreshing every 0.3s. 8 Energy restore every 12s = 20-24 per rotation, reducing ER needs 30-35%. 25-35% DPS advantage over 4-stars.

Sacrificial Jade (4-star): 454 Base ATK, 36.8% CRIT Rate, 32% Max HP, 40 EM after 5s off-field (lasts 10s). HP% directly amps Charged damage. CRIT Rate enables CRIT DMG Circlet. R5 reaches 80-85% Tome performance—viable F2P path.
Prototype Amber: 18% Max HP + 18 Energy after Burst (R5). Enables solo sustain builds. 65-70% signature DPS but justifies investment for healer-less teams.
Substat Optimization
Target: 70-75% CRIT Rate, 200-220% CRIT DMG, 35,000-40,000 HP, 150-160% ER. Each 1% CRIT Rate above 70% diminishes due to Marechaussee's 36% creating overcap. Redirect excess to CRIT DMG/HP%, maintaining 1:2 ratio after set bonuses.
HP% contributes directly: 7.32% Max HP per tick. Each 1,000 HP = +73.2 damage/tick, ~150-180 after multipliers. With 18-20 ticks per window × 2-3 windows, 1,000 HP = 5,400-10,800 damage/rotation (equivalent to 3-4% CRIT DMG).
ER varies by team: Vaporize 140-150% (Bennett particles), Freeze 170-180% (reduced generation), Lunar-Charged 150-160% (Ineffa particles). Test in Abyss Floor 12, adjust in 10% increments.
Artifact Farming
Denouement of Sin domain (Fontaine): 20 Resin/run, 1-2 5-star artifacts at AR45+. Use condensed (40 Resin) for doubled rewards = 4-5 runs daily, 8-10 drops. 25-30 days for complete sets with acceptable mains, 45-60 for optimal substats.
Strongbox conversion (3:1 ratio): Prioritize Circlets (10% drop rate) via strongbox, farm Sands/Goblets directly. Hybrid approach reduces time 15-20% (35-45 days vs 45-60).
Leveling priorities: CRIT Rate/DMG on non-HP% mains, HP% on Sands, ER until 150-160%. Recycle pieces with 3+ flat stat upgrades before +12. Saves 25-30% Artifact EXP.
Advanced Rotation Guide
Standard Framework
Support Buffs (0-6s) → Neuvillette Burst (6s) → Charged Attack 1 (8-14s) → Support Refresh (15-18s) → Charged Attack 2 (18-24s) → Reset (24s). 24s cycle aligns with Abyss DPS checks, completing 7-8 rotations across 180s.
Burst at 6s serves dual purpose: 6 Droplets for immediate stacks + 22.26% Max HP damage + 9.11% Max HP waterfall ticks. 70 Energy cost, 18s cooldown creates rotation anchors. Delay 2-4s if Energy below 70—prioritize Burst-buffed Charged Attacks.
Each Droplet consumed grants one stack (max 3), scaling 110% to 160%. Maintain 6-9 active Droplets via Burst/Skill for immediate 3-stack on Charged Attack entry. Droplets persist 15s.
Ineffa Integration
Ineffa Skill at 0s establishes Fractured Halo's 20s buffs before Neuvillette windows. 2s gap before Furina allows Electro aura creation, preventing Hydro overwhelming. Ensures 15-20 Lunar-Charged procs vs 8-12 with improper sequencing.
Off-field Electro every 1.5s creates predictable timing. Neuvillette applies Hydro 6×/s across three currents, triggering Lunar-Charged every third application (0.5s intervals). Generates 12-14 reactions first window (8-14s), 10-12 second window (18-24s) = 22-26 total.
Neuvillette Skill at 12s refreshes Droplets mid-rotation. Generates 3 Droplets + 12.86% Max HP damage, maintaining 6-9 active. 12s cooldown aligns with 24s cycles (0s/12s activations).
Animation Canceling
Charged Attack features 0.3s startup before damage. Dash-cancel after third tick (~1.5s) preserves 50 Stamina while dealing 60-70% damage. Enables 4-5 activations vs 2-3 full casts, increasing damage 15-20%.
However, dash-canceling sacrifices Droplet consumption, preventing stack generation. Optimal pattern: Full Charged (0-3s, consume 3 Droplets) → Dash-cancel (3-4.5s) → Dash-cancel (4.5-6s) → Full Charged (6-9s, consume 3 Droplets).
Stamina management critical: Dash costs 15, Charged costs 50 = 65 total vs 50 for full casts. Reserve 100 Stamina for emergency dodges. Prevents depletion forcing 3-4s recovery, eliminating dash-cancel advantages.
Energy Management
Multi-rotation consistency requires particle timing awareness. Neuvillette's Burst generates 6 Droplets converting to 3-4 Energy each = 18-24 total. Extended field time (12-14s) captures 70-80% of support particles (3× on-field vs off-field).
Ineffa Skill: 3-4 Electro particles per 12s = 6-8 per 24s. Provides 1.8-2.4 Energy off-field, 5.4-7.2 on-field. Position Neuvillette on-field during Ineffa cooldown completion (12s mark) for max capture.
Furina Burst: 60 Energy, 18s cooldown, needs 160-180% ER. Off-field Hydro generates 2-3 particles per Skill = 6-9 per rotation. Extend field time to 3-4s during rotation start, capturing Ineffa's initial particles. Sacrifices 2-3s Neuvillette time but ensures Fanfare availability.
Constellation Investment
C0 Performance
C0 achieves 45,000-55,000 DPS with Tome + Marechaussee 4pc—sufficient for 36-star Abyss. Base kit provides all essentials without constellation dependency. Comparable to Hu Tao/Alhaitham in investment efficiency.
Primary limitation: Setup time. Without C1's immediate stacks, requires 3-4s Charged Attack to consume Droplets and reach max stacks. Reduces effective windows from 12-14s to 8-10s, lowering rotation damage 12-15%. Compensate via extended rotations (28-30s) or accept reduced DPS.
C0 interruption resistance vulnerable to heavy attacks—Ruin Guard missiles, Fatui charges, boss slams interrupt stance, forcing 1-2s restart animations. Shield supports mitigate, but teams lacking shields experience 8-12% DPS loss. Most significant C0 limitation.
High-Value Breakpoints
C1 Venerable Institution: One immediate stack on field entry + interruption resistance. Reduces setup 3-4s to 1-2s, extending windows 2-3s = 10-12% DPS via uptime. Interruption resistance adds 5-8% through consistency. Total: 15-20% improvement.
C2 Juridical Exhortation: 14% CRIT DMG per stack (max 42%). Enables 260-280% total CRIT DMG with optimized artifacts. 18-22% DPS over C1, compounding with C1's uptime for 30-35% over C0. Highest value-per-constellation.
C6 Wrathful Recompense: Extends Charged Attack 1s per Droplet (max 6s) + two currents every 2s (10% Max HP each). Transforms 3s into 9s phases, tripling Stamina efficiency. Additional currents increase instances from 3 to 5. 40-50% DPS over C2. Achieves 75,000-85,000 DPS, competing with C6 limited 5-stars.
ROI Analysis
F2P: Prioritize C0 during February 4-25 rerun. Allocate saved Primos (180 pulls guaranteed) toward securing unit. C0 suffices for all content—constellations provide diminishing returns vs new characters. C0 Neuvillette + C0 Furina + C0 Kazuha outperforms C2 Neuvillette + 4-stars by 15-20%.
Low-spenders ($5-50/month): Evaluate C1 based on roster depth. Players lacking premium supports (Furina/Kazuha/Xilonen) gain more from acquiring them than constellations. Complete support rosters benefit from C1's QoL, reducing execution difficulty. $100-150 investment for 10-12% DPS + comfort.
Whales ($200+/month): Target C2 as optimal stop (30-35% DPS over C0 for ~$300-400). C3-C5 minimal value (5-8% total). C6 next meaningful breakpoint at $800-1,200 total. C2→C6 requires $500-800 for 25-30% increase—poor value vs new characters/weapons.
Common Mistakes
Cryo Enemy Misconception
Hydro on Cryo triggers Freeze not Melt, preventing damage amp. However, Neuvillette's 60-70% damage derives from raw Charged Attack scaling (HP%/Hydro DMG%/CRIT), minimally reliant on reactions. Freeze provides crowd control often exceeding Melt's 2× multiplier through hit consistency and damage reduction.
Snezhnaya Cryo enemies have neutral Hydro RES (10% base) vs -20% Pyro RES = 15-18% differential. Narrows to 8-12% with VV shred (40%), making matchup secondary to team quality. Consistent output across enemy types provides flexibility unavailable to reaction-dependent units.
Freeze's defensive value: 100% damage reduction without shields/healing. Enables aggressive optimization—prioritizing CRIT DMG over HP% for 8-10% DPS while maintaining survivability via crowd control.
Energy Recharge Overcapping
Many overcorrect to 180-200% ER when 150-160% suffices with proper execution. Each 10% excess = 2-3 substat rolls = 12-15% CRIT DMG or 10-12% HP%, reducing DPS 3-5%. Stems from off-field testing receiving 1/3 particle value vs on-field.
Proper testing: Activate support Skills → Swap to Neuvillette → Remain on-field 2-3s → Resume rotation. Captures 3× Energy, reducing requirements from 180-200% to 150-160%. Frees 6-9 substats worth 10-15% DPS.
Favonius weapons generate surplus Energy enabling sub-150% builds. Favonius Lance/Codex produces 6 neutral particles per rotation (60-70% proc rate at 30%+ CRIT) = 18-21 Energy to on-field Neuvillette, covering 25-30% Burst cost. Trade-off: 10-15% support damage for 8-12% main DPS gain.
Team Building Errors
Double Hydro without Furina: Pairing with Kokomi/Barbara/Mona for Hydro Resonance (25% Max HP) while sacrificing Furina's 75% DMG Bonus. 25% HP = 1,825 damage/tick, 32,850-36,500/rotation. Furina's 75% DMG Bonus = 75,000-95,000 amplification. 2-2.5× value differential.
Anemo misallocation: Using Venti crowd control in single-target bosses where Kazuha's 40% Elemental DMG provides superior value. Venti Burst lifts enemies beyond Charged Attack range, reducing hit consistency 30-40% and eliminating 25,000-35,000 damage/rotation. Kazuha maintains ground-level grouping.
Shield over-reliance: Zhongli provides comfort + 20% universal shred but contributes 8,000-12,000 damage/rotation. Xilonen provides healing + RES shred + Crystallize shields + 15,000-20,000 damage. 5,000-8,000 differential × 7-8 rotations = 35,000-64,000 lost damage per chamber—fails 3-star thresholds.
Spiral Abyss Strategies
Floor 12 Clears
Chamber 1: Cryo Fatui (1.2M HP, two waves). Continuous Hydro breaks shields in 2-3s. Group via Kazuha Skill before Charged Attacks, concentrating on 2-3 enemies simultaneously. 45-55s clears with C0, providing 15-20s buffer for 3-star.
Chamber 2: Cryo Regisvine (2.8M HP). Vaporize teams excel. Neuvillette-Xiangling-Kazuha-Bennett achieves 55-65s via reverse Vaporize. Target corolla during vulnerable phases, concentrating three currents on weak point for 8-10s stagger, enabling 15s burst windows.
Chamber 3: Mixed enemies (Cryo Mages/Hydro Specters/Cryo Cicins, 3.5M HP). Lunar-Charged team (Neuvillette-Furina-Xilonen-Ineffa) excels via multi-target Hydro + Electro-Charged. Prioritize Mages first (shields break 3-4s), preventing Cryo interference. 65-80s clears, 10-15s margin.
Boss Adaptations
Nod-Krai weekly boss: Phase transitions at 70%/40%/10% HP create 8-12s invulnerability. Reserve Bursts for post-transition windows. Adjustment: Phase 1 (100-70%) Charged Attacks only → Transition (8s) refresh buffs → Phase 2 (70-40%) full rotation with Burst.
Resistance fluctuations: Phase 1 (10% Hydro RES), Phase 2 (30%), Phase 3 (-10%). Creates damage variance—Phase 1/3 deal 15-20% more than Phase 2. Extend Phase 1/3 windows 2-3s, minimize Phase 2 field time.
Environmental hazards: Periodic Cryo zones deal 8% Max HP every 5s. Neuvillette's Droplet healing (16% Max HP) counteracts, maintaining net-positive regen. Position near zone edges, minimizing instances while maintaining targeting. Reduces damage taken 40-50%.
Time-Attack Optimization
3-star clears (180s) require 55,000-65,000 DPS, attainable with C0 teams. Critical optimization: Minimize transition time—pre-cast support Bursts during completion animations saves 2-3s per chamber = 6-9s across floor.
Rotation condensing eliminates unnecessary support time. Standard 24s allocates 6s support + 18s Neuvillette (75% uptime). Condensed reduces support to 4s via animation cancels, achieving 20s Neuvillette (83% uptime). 8% uptime = 4,000-6,000 damage/rotation = 28,000-42,000 per floor.
Restart optimization: Recognize failures early—chambers exceeding 70s at 50% HP indicate insufficient DPS. Restart immediately saves 60-90s vs completing, enabling additional attempts. Increases successful clears 30-40% via statistical probability.
Future-Proofing
Upcoming Content
Version 6.4 (March 2026): Snezhnaya capital with new domains. Historical patterns suggest artifact sets every 2-3 patches—potential HP-scaling/Charged Attack sets providing 8-12% DPS over Marechaussee. Current optimization remains competitive; 10% superior alternatives require 45-60 days farming for marginal gains.
Tsaritsa release 6.5-6.6 (May-July 2026): Likely Cryo support mechanics favoring Freeze. Neuvillette's established Freeze synergy positions favorably, potentially gaining 15-20% DPS through new supports without personal investment. Reaction-agnostic profile means new supports amplify existing strengths.
Deeper Snezhnaya regions may introduce Sheer Cold 2.0 with accelerated accumulation. Neuvillette's self-healing and HP-scaling provides inherent resistance to HP-drain, maintaining viability where ATK-scaling units struggle. Defensive scaling creates future-proofing beyond raw damage.
New Character Synergies
Leaked Cryo Catalyst supports (6.6-6.7): Off-field Cryo + CRIT Rate buffing. Would synergize with Freeze teams, potentially replacing Rosaria with superior CRIT sharing (20-25% vs 15%) and consistent Cryo application. Freeze uptime improvements could increase DPS 12-18%.
Electro Archon rumors: EM scaling + reaction damage amp, directly benefiting Lunar-Charged. If materialized, Neuvillette-Ineffa teams could gain 20-30% DPS through enhanced Lunar-Charged scaling. Maintain skepticism toward unconfirmed leaks.
Hydro Resonance reworks: Discussed changes from 25% Max HP to include Hydro DMG%/CRIT Rate. Would disproportionately benefit HP-scaling Hydro DPS, potentially providing 10-15% DPS without build adjustments. Official announcements occur 1-2 patches before implementation.
Long-Term Viability
Core design—HP-scaling Charged Attacks with self-sufficient mechanics—creates longevity advantages. Historical analysis: Transformative reaction DPS (Hu Tao/Diluc) maintain relevance 15-20 patches post-release, amplifying reaction units (Xiao/Itto) experience faster creep. Neuvillette's hybrid profile suggests 12-18 month viability through version 7.0-7.2 (January-April 2027).
Power creep mitigation: Staggered constellation investment. C0→C1 during acquisition for immediate QoL, C1→C2 during anniversary (September 2026) capitalizing on bonus Primos. Maintains parity with new releases without continuous spending.
Ultimate factor: Fontaine flagship position—similar to Ayaka's sustained support through Inazuma. Developers ensure regional flagships remain viable through associated content, suggesting preferential treatment via artifacts/weapons/supports. Provides confidence in 18-24 month investment horizons.
FAQ
Is Neuvillette worth pulling in 6.3? Yes. S+/S tier with 45,000-55,000 DPS at C0, sufficient for 36-star Abyss. February 4-25 Phase 2 rerun offers excellent value. New Ineffa synergies add 15-20% team damage via Lunar-Charged.
How does Ineffa buff Neuvillette? Enables Lunar-Charged (Electro+Hydro) dealing 8,000-12,000 CRIT-scaling damage per proc. Continuous Hydro triggers 22-26 reactions/rotation, adding 120,000-240,000 damage (15-18% increase). Fractured Halo provides 24-48% ATK + 40-80% Lunar-Charged DMG for 20s.
Best team compositions for Snezhnaya? Premium: Neuvillette-Furina-Xilonen-Ineffa (65,000-75,000 DPS). F2P: Neuvillette-Furina-Sucrose-Ineffa (55,000-65,000). Freeze: Neuvillette-Lauma-Rosaria-Kazuha (50,000-60,000). Vaporize: Neuvillette-Xiangling-Kazuha-Bennett (59,343).
Which artifacts for 6.3? Marechaussee Hunter 4pc (36% CRIT Rate + 15% Charged DMG). Mains: HP% Sands, Hydro DMG% Goblet, CRIT Rate/DMG Circlet. Substats: CRIT Rate/DMG > HP% > ER (150-160%). Target 70-75% CRIT Rate, 200-220% CRIT DMG.
Should I pull constellations? F2P: Prioritize C0, invest in team diversity. Low-spenders: C1 valuable (10-12% DPS + interruption resistance). Whales: C2 optimal stop (30-35% over C0). C6 requires $800-1,200 for 40-50% over C2.
How does Neuvillette compare to other Hydro DPS? Outperforms Ayato/Tartaglia in sustained scenarios (12+ seconds) by 15-25% via HP-scaling. Self-healing and interruption resistance provide superior survivability in Snezhnaya, reducing healer dependency for aggressive team compositions.