

Related articles


PUBG Mobile 4-Finger Claw Guide: Best HUD for Conqueror
Quick Answer: The 4-finger claw is the control standard for Conqueror-tier play — it enables simultaneous movement, aiming, and firing that 2-thumb can't match. The 2026 meta layout code is 7275-1794-4178-8556-303. Fire buttons at 120–140% size, 60–80% transparency, edge spacing 15–25%. Camera sensitivity: 190–200% (3rd person no scope), gyroscope 300–400% for close range. Expect basic proficiency in 3–4 days; full mastery in 2–3 weeks.
Buffget
What Is 4-Finger Claw and Why Conqueror Players Use It
Both thumbs and both index fingers on screen simultaneously. That's the setup. It unlocks something 2-thumb physically can't do: move, aim, fire, and crouch at the same time.
In Conqueror lobbies, a 2-thumb player must lift a thumb off the movement joystick to fire — a brief but fatal pause. Claw players never stop moving during gunfights, making them harder to hit and faster on spray control for weapons like the M416 and AKM.
Your left index finger handles crouch or peek. Right index finger manages scope or fire. Both thumbs control movement and camera. The result: jump-peek-fire sequences in one fluid motion — a technique that routinely wins close-range fights against 2-thumb players in Ace and Conqueror brackets.
When to switch: If you're consistently Platinum or above and losing gunfights due to movement limits, make the change. But if your sensitivity is unstable or you're still learning AR spray patterns, fix those first. Switching mid-grind without a practice plan will drop your rank before it improves.
Building the Best 4-Finger Claw HUD for Conqueror Rush
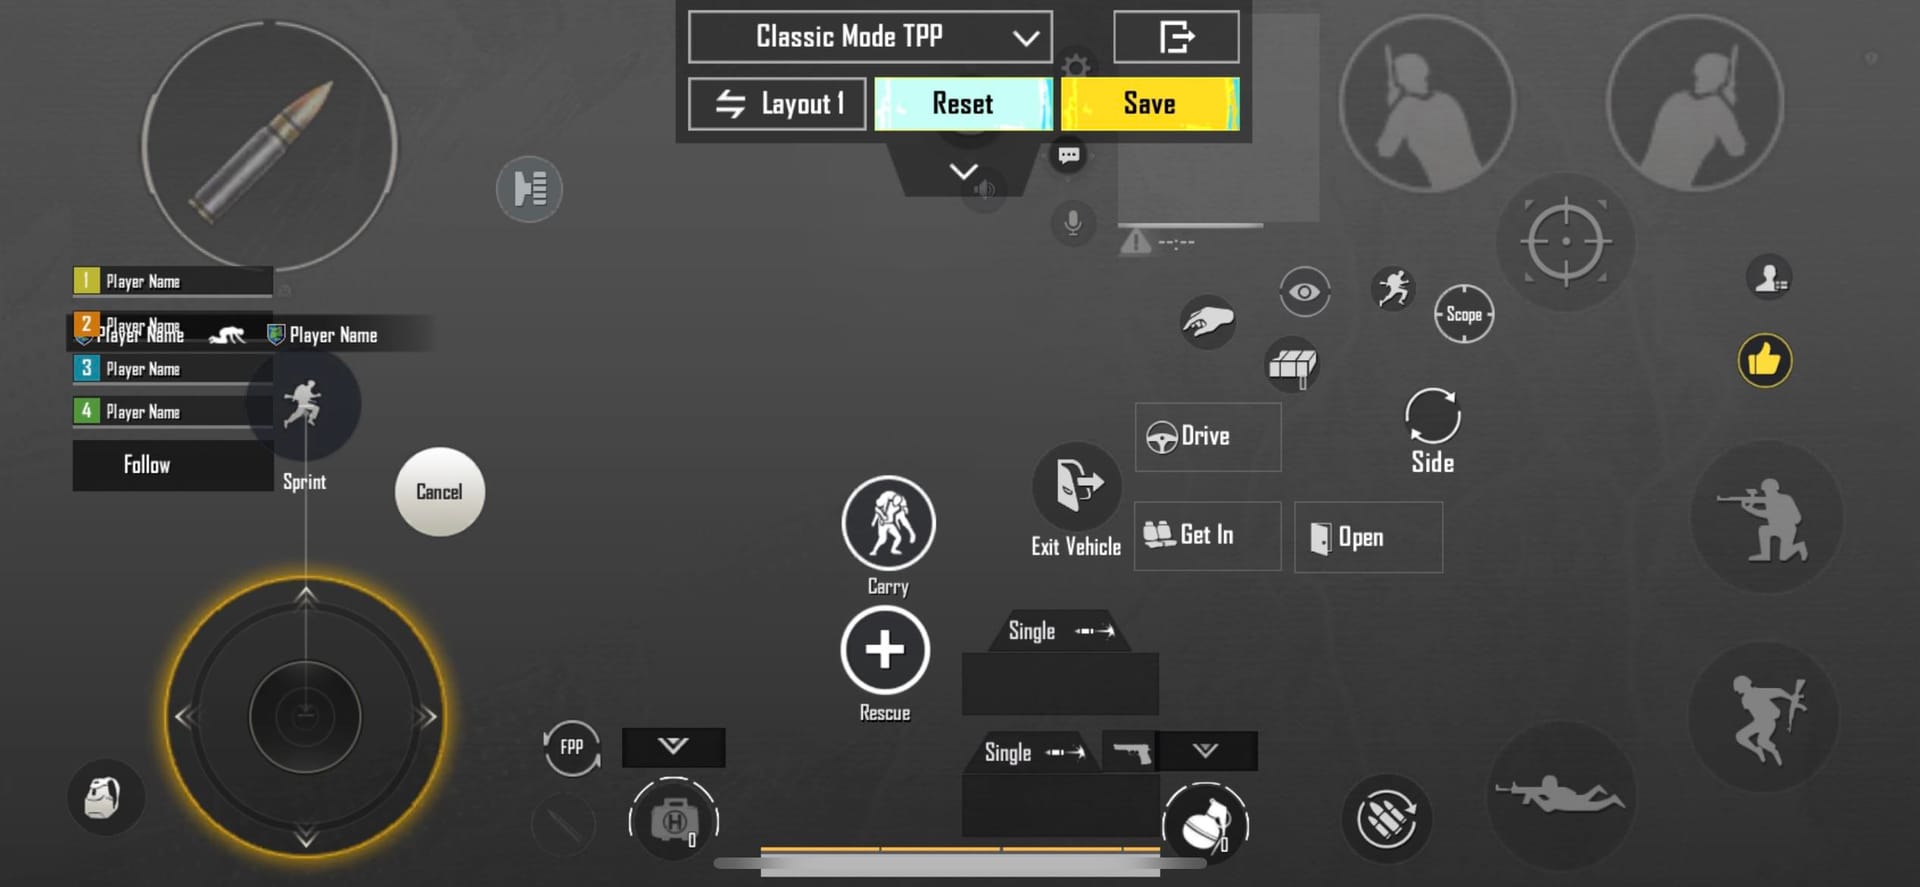
Core Button Placement
The four critical buttons: fire, scope, crouch, and peek. Fire buttons go in the upper-right and upper-left quadrants — wherever your index fingers naturally rest without stretching. Crouch and peek belong where your non-dominant index finger can tap without disrupting camera control.
Competitive HUD specs:
- Fire button size: 120–140%
- Button transparency: 60–80%
- Minimum spacing between elements: 15%
- Edge spacing: 15–25% from screen borders
- Scope Mode: Hold
- Peek & Fire: On
- Peek Mode: Mixed
- Camera Rotation while Leaning: Disable
- Camera Rotation while ADS: Disable
- Jump/Climb: Separate
- Show Left Fire Button: Always On
2025 Layout Codes
- 7275-1794-4178-8556-303 — 2025 meta standard, works for most competitive setups
- 6974-6998-1946-2820-026 — optimized for medium-to-large phones
- 6960-4897-8808-0654-298 — AR-focused, fire button tuned for spray control
- 6960-4897-8808-0564-299 — sniper-focused, scope button priority
On 6.5-inch screens, the medium-large phone code fits best. That screen size is the sweet spot for 4-finger claw — index fingers reach upper-quadrant buttons without compromising thumb joystick control.
HUD Import Steps
- Open Settings in PUBG Mobile
- Go to Customize Buttons
- Tap Customize → Layout Management
- Select Search, paste your layout code
- Tap Apply
After importing, spend 5 minutes in Training Ground confirming every button is reachable without repositioning your hand. If anything requires a stretch, fix it before your next ranked session.
Screen Size Adjustments
- Under 6 inches: Drop fire button size to the lower end of 120%, tighten edge spacing
- 7-inch tablets: Spread buttons further apart; 6-finger claw becomes viable, though 4-finger stays more consistent for ranked due to lower input complexity
For players keeping their ranked grind fully equipped, discounted PUBG Mobile UC via player ID is available through buffget with competitive pricing and fast delivery.
Sensitivity Settings for 4-Finger Claw
Camera Sensitivity
- 3rd Person No Scope: 190–200%
- 1st Person No Scope: 130–150%
Start at the midpoint of each range. If the camera feels sluggish, increase. If it overshoots, decrease. Change only one value per session — isolating variables is how you identify what actually needs fixing.
ADS Sensitivity by Scope
- Red Dot / Holographic: 50–60%
- 2x Scope: 35–45%
- 3x Scope: 25–35%
- 4x Scope: 20–30%
- 6x Scope: 15–23%
- 8x Scope: 10–15%
Sensitivity code 7307-1085-6780-4282-435 provides a calibrated starting point. The zero-recoil code 1-7462-2496-3022-3831-210 is useful for recoil pattern study in Training Ground but shouldn't replace personalized tuning.
Gyroscope
Strongly recommended for 4-finger claw. Physical tilt supplements thumb camera movement, enabling faster micro-adjustments during sprays without disrupting layout inputs.
- No Scope to 2x: 300–400%
- 3x Scope: 240–300%
- 4x Scope: 200–210%
- 6x Scope: 100–170%
- 8x Scope: 50–100%
High-level competitive players use approximately 300% gyro for Red Dot engagements and ~236% for 3x scope tracking — confirming these ranges reflect genuine high-rank usage.
Common HUD Mistakes Killing Your Rank
Copying pro layouts without adaptation. Pro HUDs are built for specific hand sizes, phone models, and thousands of hours of muscle memory. Import a pro layout as a structural reference only, then reposition buttons to match your natural finger placement in Training Ground before taking it ranked.
Button clutter. Overcrowding with vehicle boost, emotes, and inventory shortcuts creates accidental input zones. Maintain 15% minimum spacing between all elements. If you occasionally misfire one button for another, separate them immediately.
Misplaced fire buttons. Too low forces index fingers to curl, slowing tap speed and causing fatigue. Too high pushes fingers into an extended position that reduces precision. Pro tip: hold your device without looking at the screen and note where your index fingertips naturally land — that's where fire buttons belong.
Conqueror Rotation Strategy
The Core Principle
Conqueror rotation is predictive, not reactive. The moment the white circle appears, identify the geometric center and which terrain features — ridgelines, compounds, tree lines — sit within the final playable area. Move toward those positions before the blue zone forces you.
Early rotation = position choice. Late rotation = whatever cover remains.
Rotation by Game Phase
Early game (outside top 50): Prioritize loot efficiency. Use vehicles when distance to safe zone exceeds 600 meters. Sound exposure is acceptable here — engagement density is lower.
Mid game (top 30–20): Dismount 200–300 meters from your intended position. On-foot movement through cover is mandatory. Always identify where the nearest active gunfight is before committing to a rotation path — third-party awareness is critical.
Late game (top 10 and below): Vehicles are almost always a liability. Engine noise in a final circle marks your position to every remaining player. Rotate on foot, use terrain, and time movements to coincide with active gunfights elsewhere.
Blue Zone Timing
Blue zone damage scales with phase number. Practical rule: if you can't reach the white circle edge within 60% of the remaining timer, you need a vehicle or must accept blue zone damage as a calculated cost.
Map-Specific Rotation Routes
Erangel: Control elevated terrain. School-to-Pochinki corridor, Mylta Power ridgeline, and hills northeast of Georgopol are consistent final-circle anchor points. Rotate compound-to-compound using tree lines. Avoid open fields entirely in mid-to-late game.
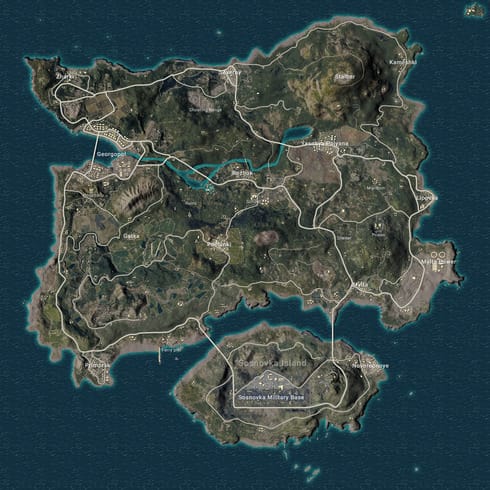
Miramar: Vehicles are non-negotiable for mid-game rotation. Secure one early, reach ridge positions before top 20, then abandon it and hold high ground. The ridgelines running north-south through the center are the only viable late-game cover. On-foot rotations across open terrain in Conqueror lobbies get punished consistently.
Sanhok: Smaller map compresses all phases — blue zone moves faster, engagements are denser. Rotate aggressively toward center early, use river systems as movement corridors, and always assume a third team is watching any gunfight you're considering engaging.
Vikendi: Snow terrain reduces visual concealment. Use building clusters and valley systems for cover. Snowmobiles offer faster rotation with lower sound signature than wheeled vehicles — preferred when available. The v4.1 update confirmed for November 6, 2025 may adjust Vikendi's blue zone parameters; verify zone timing after that update cycle.
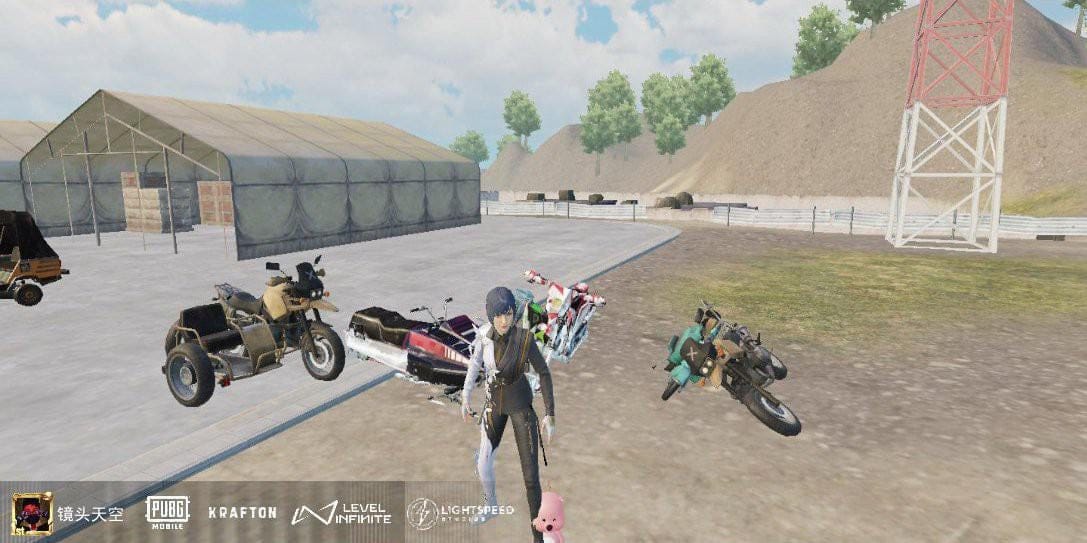
Vehicle vs. On-Foot: The Decision Framework
Use a vehicle when:
- Distance to safe zone exceeds 500 meters in mid-game
- Blue zone timer is under 90 seconds and you're outside the circle
- Rotation path crosses open terrain with no viable cover
Avoid vehicles when:
- You're in the top 15 and the circle is small
- Enemy squads are positioned along your rotation path
- You're within 300 meters of your intended final position
Dismount behind hard cover — a building, rock formation, or hillside. Never in open ground. Conqueror players specifically watch for vehicles stopping in the open because it signals a predictable dismount position.
Late-Game Positioning and RP Maximization
Final Circle Principles
Prioritize positions with at least two directions of cover and one viable escape route. Never commit to a single-exit position — if that exit gets covered, you're done.
Your 4-finger claw setup is a direct advantage in close-range endgame fights. Simultaneous crouch, peek, and fire makes you significantly harder to hit in compressed final circle spaces. Use this actively — don't play passively if your position is compromised.
Kills vs. Placement
Placement points outweigh kill points at the Conqueror threshold. A top-3 finish with zero kills generates more RP than a 5-kill elimination in 15th place. Engage only when the risk-to-reward ratio clearly favors you — isolated targets, positional advantage, or defensive necessity. Let enemies eliminate each other whenever possible.
For staying competitive with the latest weapon skins, battle passes, and ranked season resources, safest site to buy PUBG Mobile Unknown Cash — buffget — offers secure transactions, high user ratings, and wide game coverage.
Practice Routine to Lock In 4-Finger Claw
Basic proficiency: 3–4 days. Full mastery under ranked pressure: 2–3 weeks. Consistency beats volume.
Daily drill sequence (10–15 minutes minimum):
- Recoil drills (10 min): Training Ground, spray M416 and AKM at targets 50 and 100 meters out. Keep crosshairs on target through the full magazine using gyroscope correction.
- Movement drills (5 min): Practice jump-peek-fire sequences against stationary targets. Confirm crouch and peek buttons activate without disrupting camera control.
- Sensitivity check (3 min): If you adjusted any value, verify the change improved tracking before taking it ranked.
When to Stop Tweaking
Once your settings fall within the recommended ranges and you can complete recoil drills without significant deviation — stop changing values. Muscle memory can't develop against a moving target. Commit to your settings for a minimum of 5 ranked sessions before evaluating whether a change is genuinely needed.
Track These Three Metrics Weekly
- Survival rate: Consistently reaching top 15?
- Average damage per match: Should increase as spray control improves
- Rotation success rate: How often do you reach your intended position before blue zone forces a compromise?
Low survival + high damage = rotation decisions need work. High survival + low damage = engagement selection is too passive. Use these to identify whether your next training focus should be mechanical or strategic.
Frequently Asked Questions
Q: What's the best 4-finger claw HUD layout code for Conqueror in 2025? The meta standard is 7275-1794-4178-8556-303. AR-heavy playstyle: 6960-4897-8808-0654-298. Sniper-focused: 6960-4897-8808-0564-299. Import via Settings → Customize Buttons → Layout Management → Search.
Q: How long does it take to get used to 4-finger claw? Basic proficiency in 3–4 days with 10–15 minutes of daily Training Ground drills. Full muscle memory under ranked pressure takes 2–3 weeks of consistent practice.
Q: What sensitivity settings work best with 4-finger claw? Start at 3rd Person No Scope 190–200%, Red Dot ADS 50–60%, gyroscope 300–400% for close range. Use sensitivity code 7307-1085-6780-4282-435 as a baseline, then adjust one value at a time.
Q: Is 4-finger claw actually better than 2-thumb for Conqueror? Yes — once you've built the muscle memory. The 2–3 week transition will temporarily affect performance, but the long-term mechanical advantage in Conqueror lobbies is significant.
Q: Vehicle or on-foot in late-game Conqueror matches? On foot in the top 15. Engine noise immediately reveals your position to players actively listening for rotations. Use vehicles only when distance exceeds 500 meters or the blue zone timer makes on-foot rotation impossible.
Q: Should I focus on kills or placement for Conqueror RP? Placement. A top-3 finish generates more RP than a multi-kill elimination in 15th. Engage only from positional advantage or defensive necessity — let enemy squads eliminate each other and rotate to capitalize on weakened survivors.