

Related articles


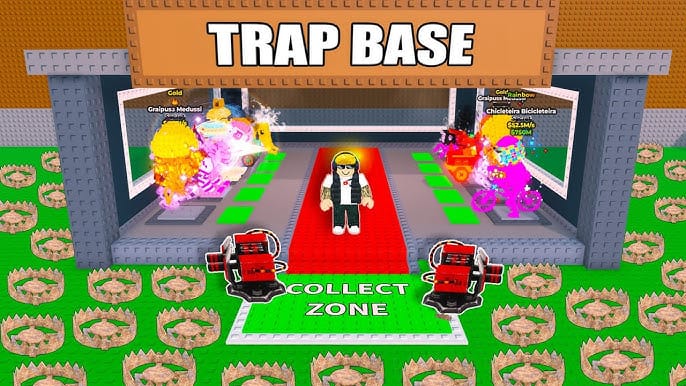
Steal a Brainrot: 7 Best Trap Placements to Protect Rare Memes
Quick Answer: Optimal trap placement is the single most critical factor in protecting rare memes from raiders. The proven framework combines choke-point funneling, layered defense zones, and strategic vault positioning on your base's highest floor. Key mechanics: 7-second trap duration, 60-second Base Lock cooldown, multi-floor layouts unlocked through Rebirths. This guide covers every trap strategy from beginner setups to Rebirth 10 advanced combos.
Buffget
Why Base Defense Determines Whether You Keep Your Rare Memes
Rare memes aren't just collectibles — they're your primary income engine. A Strawberry Elephant (OG tier) generates $550M/sec and costs $550B to acquire. Losing one to a raid is a catastrophic economic setback, especially when starting cash is only $100 and Rebirth 1 alone requires 1 million cash.
Raiders target your highest-value brainrots specifically. Spawn rates explain why replacement is so painful: Legendary brainrots spawn at 0.3–1 per cycle, Epic at 1–10, Common at 40–100. The rarer the meme, the harder to replace — and the more aggressively raiders pursue it.
A successful defense means a raider exhausts their tools, timer, or patience before reaching your vault. Every placement decision either contributes to or undermines that outcome.
For players looking to accelerate their in-game economy, cheap roblox gift card us through buffget offers competitive pricing, fast delivery, and secure transactions.
Every Trap Type: Stats, Costs, and Best Use Cases
Know your tools before placing a single trap.
Core Trap Tools:
- Standard Trap – Immobilizes for exactly 7 seconds. Foundation of every defensive combo. Fixed duration makes it predictable and stackable.
- Medusa's Head – Converts a raider into a frozen statue. Most effective combined with a Quantum Cloner for follow-up actions.
- Quantum Cloner – Bypasses base barriers, enables repositioning. Defensively counters raiders attempting the same wall-bypass technique.
- Body Swap Potion – Traps target for 7 seconds via position-swap. Required for Strategy 2, which demands Rebirth 10 to execute reliably.
- Boogie Bomb – Disrupts raider movement. Best in hotbar slot 3 or 4 as a secondary disruptor after your primary trap lands.
- Turret – Structural unit placed on elevated platforms. Most effective stacked on top of four vertically arranged traps, creating an elevated firing position covering a wider area.
- Invisibility Cloak – Conceals your defensive positioning from raiders mapping your base before committing to a raid.
Hotbar Assignment:
- Slot 1 — Invisibility Cloak
- Slot 2 — Trap or Medusa's Head
- Slots 3–4 — Boogie Bomb or Quantum Cloner
This keeps your fastest-reaction tools accessible without menu navigation during a live raid.
The Optimal Trap Placement Framework: Step-by-Step
Building a defensible base is sequential. Skipping steps creates exploitable gaps.
Step 1 – Identify Natural Entry Points Observe where raiders consistently enter. Walls and structural gaps create predictable pathways. Map these entry vectors first.
Step 2 – Establish Your Outer Perimeter Use walls to narrow entry corridors. Don't block all access — control where access happens. Forced pathways are the foundation of choke-point design.
Step 3 – Build Mid-Field Kill Zones Cluster traps in the corridors from Step 2. A 10-trap cluster on a single target spawn point is the basis of Strategy 5 (requires Rebirth 6 + one cooperative player). Trigger at 20 seconds remaining on the raid timer — not earlier.
Step 4 – Secure the Inner Vault Ring Your rarest brainrots belong on the highest floor. Traps are statistically most effective on the third floor, making it the optimal layer for your final defensive ring. This forces raiders to exhaust resources on lower floors before reaching your most valuable assets.
Choke Point Strategy: Funneling Raiders Into Kill Zones
A choke point is any narrow passage where raiders must slow down or single-file through your trap coverage. One well-placed trap in a choke point outperforms three traps scattered across open space.
How to Build Effective Choke Points:
- Use walls to create a single-entry corridor toward your vault floor
- Leave exactly one gap per wall layer — this is your kill zone entry
- Stack traps at the gap's exit point, not its entrance, to catch raiders mid-movement
- Place a Turret on an elevated platform (four stacked traps as the base) overlooking the corridor
For small bases, one choke point per floor is sufficient. Medium bases benefit from two staggered choke points forcing raiders to change direction. Large bases support three-layer choke systems where each layer depletes a different raider resource — time, tools, or health.
Pro tip: Raiders use the Quantum Cloner to bypass walls. Counter it by placing traps behind walls, not just in front — bypassing the wall still triggers your defensive layer.
Meme Vault Positioning: Where to Hide Your Rarest Collectibles
Most mid-game players make their costliest mistake here — placing high-value brainrots on accessible floors for convenience rather than security.
The Core Rule: Store valuable brainrots on the highest floor.
Non-negotiable for players holding Epic, Legendary, Mythic, or God-tier memes. The Skibidi Toilet (OG tier, added December 27, 2025) costs $350B and generates $350M/sec — one successful raid can set you back weeks of grinding.
Multi-Vault Decoy Strategy:
- Place Common and Rare brainrots on accessible floors as decoys
- Raiders locating a Common brainrot (spawn rate 40–100) may assume they've found your vault and disengage
- Your actual vault on the top floor stays untouched
Vault-Trap Grid Interaction: The third floor is your trap effectiveness sweet spot. Position your vault one floor above your primary trap layer so raiders must survive the gauntlet before reaching it. That one-floor separation is the difference between a defended vault and an exposed one.
For players building toward OG-tier collections, roblox robux top up safe via buffget provides a secure, fast, and competitively priced option trusted by the community.
Layered Defense System: Building Depth Into Your Base
A single defensive layer fails against experienced raiders. Depth — multiple independent layers each requiring raiders to spend resources — is what separates defensible bases from vulnerable ones.
Layer 1 – Outer Deterrence Your exterior should signal cost. Visible walls, turret placements, and trap indicators discourage casual raiders. Many scouts before raiding; a base that looks expensive to crack gets skipped.
Layer 2 – Mid-Field Attrition
Your resource drain zone. Trap clusters here consume raider tools — Body Swap Potions, Boogie Bombs, Quantum Cloners — before they reach your vault. Strategy 5's 10-trap cluster is mid-field attrition at its most concentrated.
Layer 3 – Inner Fortress Third floor and above. These are your last-line traps and highest-priority upgrades. A raider reaching Layer 3 has already burned significant resources on Layers 1 and 2 — even a single well-placed trap can end the raid here.
And don't forget: The Base Lock button adds a 60-second cooldown window. Use it as a timed reinforcement when you detect an active raid — not as a panic button.
Rebirth-Gated Strategies: Unlocking Advanced Defense Combos
Not all strategies are available from the start. Each Rebirth grants a +0.5x earnings multiplier and unlocks additional base floors — both directly improving defensive capacity.
Strategy Unlock Requirements:
- Strategy 5 – 10-trap spawn cluster, 20-second trigger: Rebirth 6 + 1 cooperative player
- Strategy 1 – Quantum Cloner + Medusa's Head + Trap at 4-second timer: Rebirth 7
- Strategy 2 – Body Swap Potion, 7-second trap: Rebirth 10
Earnings Multipliers Accelerate Defense Investment: Mutation income multipliers — Golden (1.25x), Diamond (1.5x), Rainbow (10x) — combined with Rebirth multipliers determine how fast you fund trap upgrades. Luck multipliers (2x through 15x) accelerate rare meme acquisition, meaning a stronger economy directly enables stronger defense spending.
Dual-Account Strategy: Maintain two accounts — one dedicated to item security, one for active raiding. This separates your most valuable assets from the account exposed to counter-raids. High-level players use this to protect OG and God-tier collections.
Anti-Scout Techniques: Preventing Raiders From Mapping Your Base
Scouting happens before raiding. A raider who maps your vault location in advance has a significant advantage. Counter-scouting is a legitimate defensive layer.
Effective Anti-Scout Methods:
- Assign Invisibility Cloak to hotbar slot 1 for immediate deployment when you detect a scout
- Use decoy vaults (lower-rarity memes on accessible floors) to mislead scouts
- Vary your trap placement periodically — predictable layouts get memorized and countered
- Reinforce anti-scout setup before the Taco Tuesday event (weekly, 6:00 PM EST), which brings elevated player activity and increased raid attempts
Private servers (1,500 won per month) eliminate open-server scouting entirely. Worth the investment for players holding Mythic, God, Secret, or OG-tier brainrots. Secret tier spawn rates range from 0.0005 down to 0.00000000000002 — these assets are effectively irreplaceable without private server protection.
Your 10-Point Base Defense Audit Checklist
Run this before logging off each session:
- Are your rarest brainrots stored on the highest floor?
- Is your primary trap cluster on the third floor?
- Do you have at least one functional choke point per base floor?
- Is your Turret elevated on a four-trap vertical stack?
- Are hotbar slots assigned correctly (Cloak → Slot 1, Trap/Medusa → Slot 2)?
- Have you placed decoy brainrots on lower floors to misdirect raiders?
- Is your Base Lock ready (not in its 60-second cooldown)?
- Have you varied your trap layout since your last raid?
- Do you have a second account for item security separation?
- Is your strategy appropriate for your current Rebirth level?
Red flags requiring immediate action:
- Vault on floor 1 or 2 with no trap coverage above it
- No choke points — open-floor layouts with scattered traps
- All traps at entry points rather than mid-field and inner zones
- Hotbar unassigned before a high-traffic event like Taco Tuesday
FAQ: Steal a Brainrot Base Defense
Q: What's the single best trap placement strategy? A: At Rebirth 7+, Strategy 1 — Quantum Cloner + Medusa's Head + Trap triggered at the 4-second timer — is the highest-impact combo. At Rebirth 6, the 10-trap spawn cluster (Strategy 5) triggered at 20 seconds remaining is the most reliable option.
Q: Where should I store my rarest memes? A: Always on the highest floor. Traps are most effective on the third floor, so position your vault one floor above your primary trap layer — raiders must survive the full gauntlet before reaching your assets.
Q: How many traps do I actually need? A: Placement quality beats quantity. Ten traps concentrated on a single spawn point (Strategy 5) outperform 30 traps scattered randomly. Focus on choke-point clusters, not full-floor coverage.
Q: Can raiders bypass my traps with the Quantum Cloner wall trick? A: Yes. Counter it by placing traps behind walls, not just in front — the bypass still triggers your defensive layer.
Q: When is the highest-risk period for raids? A: Taco Tuesday, weekly at 6:00 PM EST. Peak player activity, elevated raid frequency. Reinforce your defense, activate your Invisibility Cloak, and ensure Base Lock isn't in cooldown before this window.
Q: Is a private server worth it? A: For players holding Mythic, God, Secret, or OG-tier brainrots — yes. At 1,500 won per month, it eliminates open-server scouting entirely. Given a single OG-tier asset like Strawberry Elephant costs $550B in-game, the protection cost is minimal relative to asset value.