Related articles
T7 Thermal Imager Barter Guide: Cheapest Farming Strategy
The T7 Thermal Imager is a high-value optic in Arena Breakout, averaging 215,000 Koen with market fluctuations of 25-30%. Players can efficiently farm this item from Armory advanced crates with an 8-12% drop rate. Using budget loadouts of 28,000-35,000 Koen, operators can achieve a positive ROI within 8-12 raids by targeting specific high-value containers and bunkers.
Buffget
What is the T7 Thermal Imager?
The T7 Thermal Imager is a tier-seven optic attachment that detects heat signatures, offering a tactical edge in combat. It weighs 0.92kg and provides 15-20% faster target acquisition compared to the T5 model. However, expect a 2-3% handling reduction, which slightly affects weapon maneuverability. This scope is essential for night operations where identifying targets quickly is critical.
Market value varies significantly by season:
- Seasons 1 & 4: 180,000 – 250,000 Koen (Average: 215,000)
- Seasons 2 & 6: Spikes to ~2,000,000 Koen
This volatility of 25-30% makes understanding the acquisition method crucial for your in-game economy. To maximize efficiency, consider managing your funds through platforms like Arena Breakout recharge which offers competitive pricing and secure transactions.
Why Farm Instead of Buying?
Purchasing directly from the market exposes you to significant price swings. Farming the item yourself offers savings of 60-70% compared to current market prices. By utilizing a budget loadout costing between 28,000 and 35,000 Koen, you can run 8-12 raids to statistically secure one T7 Thermal Imager.
This approach minimizes the risk of losing high-value gear while accumulating profit. A budget loadout featuring tier-two armor allows for consistent runs without devastating financial loss upon death. This method is particularly effective during night raids, where the population is reduced by 20-30%, allowing for safer looting opportunities. By targeting specific high-value containers, you bypass Flea Market fees and volatility entirely.
Best Locations to Farm T7 Thermal Imager

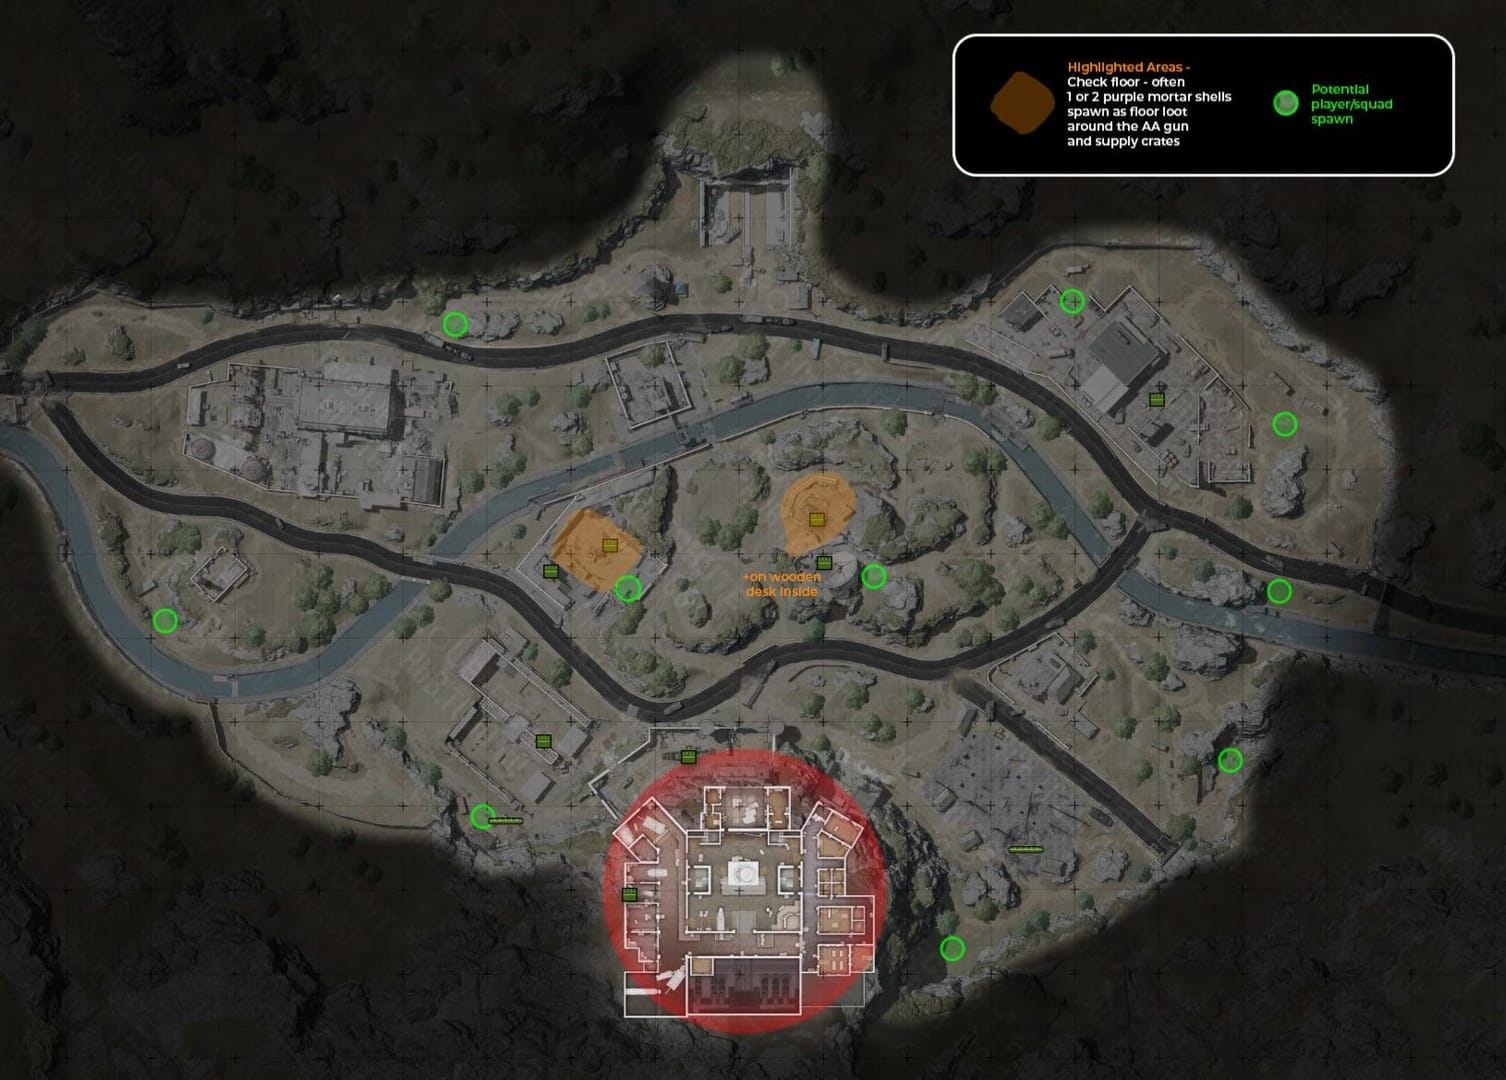
The Armory map is the definitive location for acquiring the T7 Thermal Imager due to its density of high-tier loot containers.
Primary Targets:
- Repair Facility: Houses advanced weapon crates with an 8-12% drop rate. This is the most reliable source. Note: The facility is often 60% empty by minute 6, requiring immediate action upon spawning.
- Equipment Storage: Contains locked safes offering a 5-7% drop rate.
Secondary Targets:
- Standard Weapon Crates: Available with a 2-4% drop rate, but the time investment versus reward makes them a lower priority.
- Elite Enemies (Renoir/Rors): Provide a 3-5% chance to drop the T7. However, relying on boss spawns is inconsistent compared to looting fixed containers.
Pro Tip: Prioritize the Repair Facility first, then sweep safes in Equipment Storage.
Optimal Farming Routes and Timers
Efficiency in Armory depends on precise timing and route optimization.
The Strategy:

- Sprint directly to the Repair Facility, arriving between 2:15 and 2:30 into the match. This window allows you to secure loot from advanced weapon crates before other players clear the area.
- Move toward the bunker path starting from the Tunnel spawn, hitting the Gas Station along the way.
- Revisit the Repair Facility after the 6-minute mark to check for respawns or missed items.
Bunker Timers:
- Hole in the Wall: 1:40 timer
- Mid: 1:40 timer
- Tank: 1:00 timer
Extraction Points:
- Canal: Available after 3 minutes
- Radar Station: Available after 2:30
- Mine: Available after 5 minutes
Loadout Strategy for ROI
Selecting the right gear is vital for maximizing ROI over 8-12 raids.
Budget Loadout (Recommended for Farming)

- Cost: 28,000 – 35,000 Koen
- Armor: Tier-two
- Benefit: Provides enough protection for scav engagements while keeping costs low enough to absorb losses.
Mid-Tier Loadout
- Cost: 95,000 – 120,000 Koen
- Armor: Tier-four
- Benefit: Better survivability and compatible with Lockdown mode.
Pro Tip: Tier-four armor is the minimum recommended for serious farming runs to ensure protection against elite AI like Boss Renoir, who drops tier-4 armor and T5 gear. Understanding the Arena Breakout Bonds price fluctuations is crucial for timing your purchases, but farming remains the most cost-effective method for long-term economy management.
Premium Loadouts (Not Recommended)
- Cost: 140,000 – 180,000 Koen
- Reason: Increased risk-to-reward ratio makes them inefficient for pure farming.
Advanced Tips and Mechanics
Maximizing loot per hour requires understanding search mechanics and map population dynamics.
- Search Times: Searching an advanced weapon crate takes 8-10 seconds, while standard crates take 12-15 seconds. Prioritizing advanced crates minimizes exposure time while maximizing the probability of a T7 drop.
- Container Goal: A successful raid should involve searching 12-15 high-probability containers to maintain statistical consistency.
- Night Raids: Statistically safer due to the 20-30% reduction in player population. The T7 Thermal Imager is most effective in these conditions, ironically making it easier to farm the item using a lower-tier thermal or night vision.
- Secure Container: Utilize a secure container to preserve high-value barter items found in safes or on elite scavs, ensuring that even a death results in partial progress toward the goal.
FAQ
What is the market price of the T7 Thermal Imager? The average price is 215,000 Koen, typically ranging between 180,000 and 250,000 Koen, though it can spike to 2,000,000 Koen in specific seasons.
Where is the best place to find the T7 Thermal Imager? The Armory map, specifically the Repair Facility advanced weapon crates which have an 8-12% drop rate, is the best location.
What is the cheapest way to get a T7 Thermal Imager? Farming with a budget loadout of 28,000-35,000 Koen over 8-12 raids offers 60-70% savings compared to buying from the market.
How much faster is the T7 compared to the T5? The T7 Thermal Imager provides 15-20% faster target acquisition than the T5 model.
What are the spawn timers for key bunkers in Armory? The Hole in the Wall and Mid bunkers have a 1:40 timer, while the Tank bunker has a 1:00 timer.
Does the T7 Thermal Imager affect weapon handling? Yes, it imposes a 2-3% reduction in weapon handling compared to base stats.


