

Related articles


Genshin Impact 6.1 Banners: Pull Nefer & Furina for 70 F2P Pulls Guide
Genshin Impact's Version 6.1 Luna II kicks off on October 22 and wraps up December 2, 2025. We're talking Nefer, the fresh 5★ Dendro Catalyst DPS headlining Phase 1 with Furina's rerun, then Arlecchino and Zhongli taking the stage in Phase 2.
Buffget
Getting the Lay of the Land in Genshin 6.1 Banners
A Quick Rundown on Version 6.1 Luna II
This patch drops October 22, 2025, and runs until December 2, split into two 21-day phases. Heads up: maintenance hits at 6:00 AM UTC for about 5 hours, and you'll snag 300 Primogems as comp. If you're gunning for Nefer, start pre-farming those 46 Frostnight Herra drops – you'll need 'em for her Level 90 ascension (that's 12-15 kills, with respawns every 3 days). Lunar-Bloom here scales CRIT based on your reactions, hitting peak DPS party stats at 100% for Nod-Krai setups like Nefer paired with Lauma, churning out Verdant Dew like nobody's business.
Why Bother Tracking These Banners?
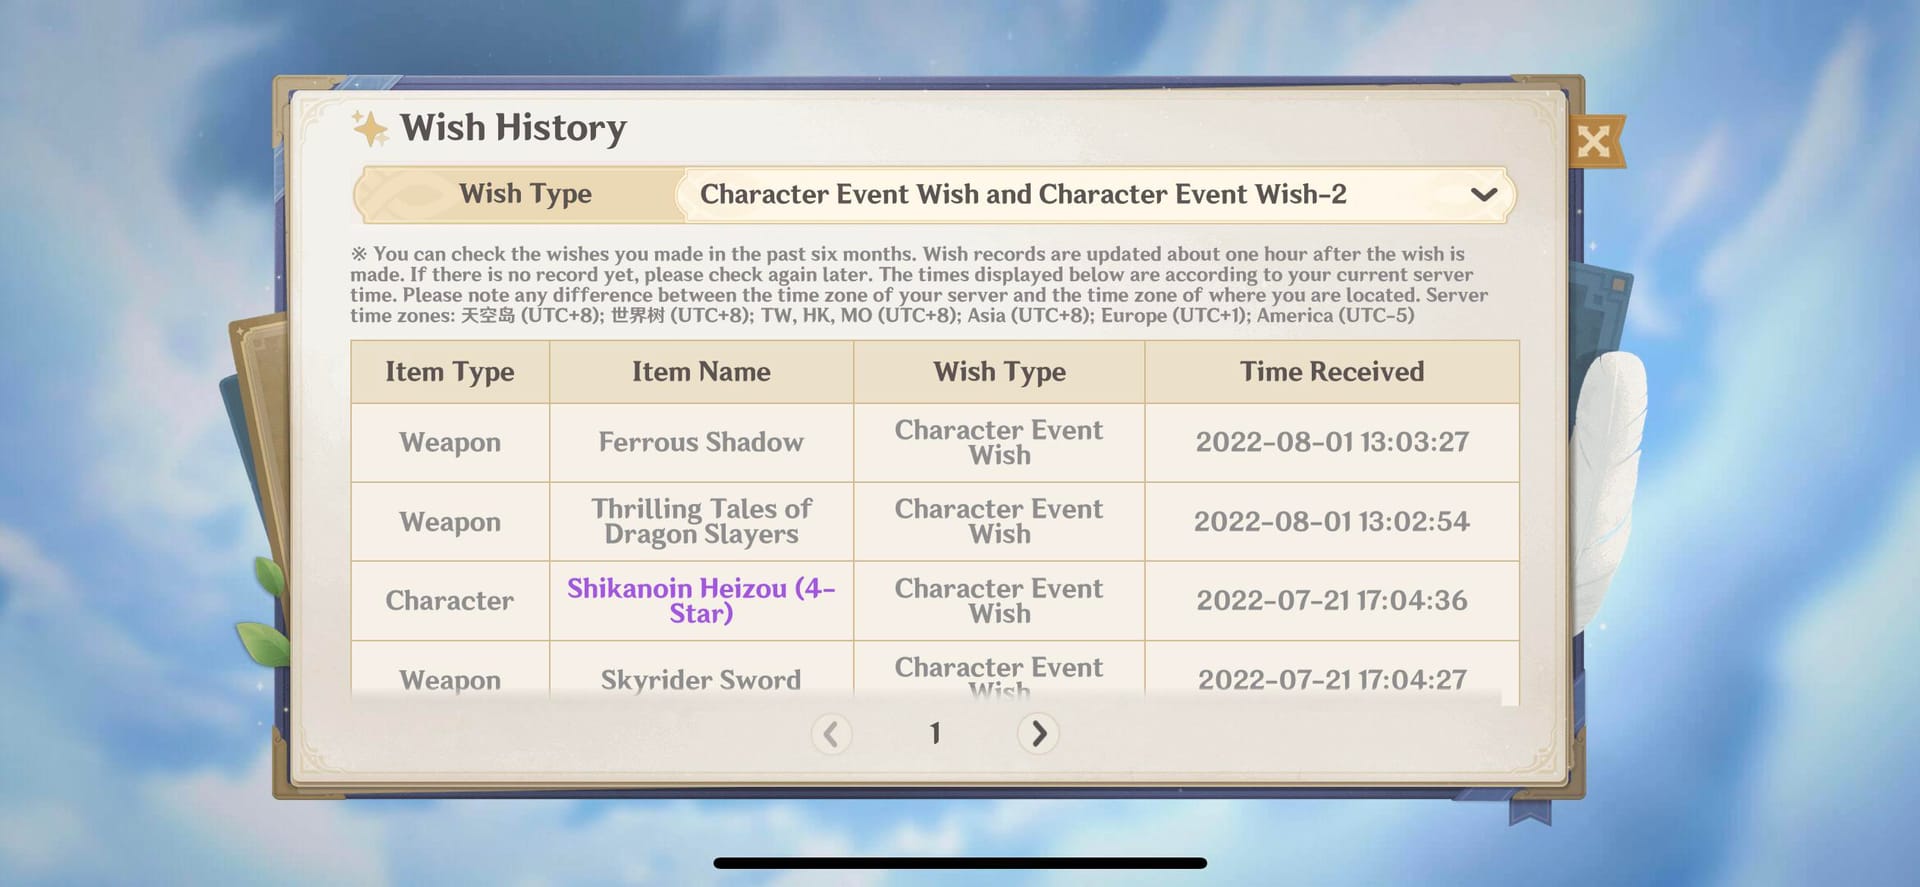
Look, 6.1 dishes out roughly 9,380 F2P Primogems, good for ~70 pulls – that's your ticket to shaking up your roster. Banners have been flipping every 21 days since September 28, 2020; pity carries over between phases but resets when the version changes. Snag those 3 livestream codes for an extra 300 Primogems (they expire in 24 hours), pushing you toward soft pity at 76. Keep tabs on your pulls through the in-game Wish history – it's a lifesaver. And get this: the 6.1 Lunar meta bumps Dendro's viability in Spiral Abyss floors 9-12 by 20-30%. Ever wonder why some players clear faster? It's all in the planning.
November 2025 Banners: What's Live Right Now
Breaking Down the Event Wishes
Phase 1 runs October 22 to November 11, 2025, spotlighting Nefer (that 5★ Dendro Catalyst) and Furina's rerun (5★ Hydro Sword). Boosted 4★s? Xingqiu (Hydro Sword), Collei (Dendro Bow), and Yaoyao (Dendro Polearm). Then Phase 2, November 11 to December 2, brings Arlecchino (5★ Pyro Polearm rerun) and Zhongli (5★ Geo Polearm), with Lan Yan (Anemo Catalyst), Rosaria (Cryo Polearm), and Yun Jin (Geo Polearm) as the 4★ rate-ups. Base 5★ rate's 0.6%, climbing to 1.6% at soft pity (76 pulls), and you've got that 50/50 shot at the featured character. 4★s drop at 5.1% every 10 pulls. Character pity locks in a 5★ at 90 pulls (carries over phases), while weapons hit guarantee at 80 with the Epitomized Path system.
Spotlight on Nefer and the Rate-Up Crew
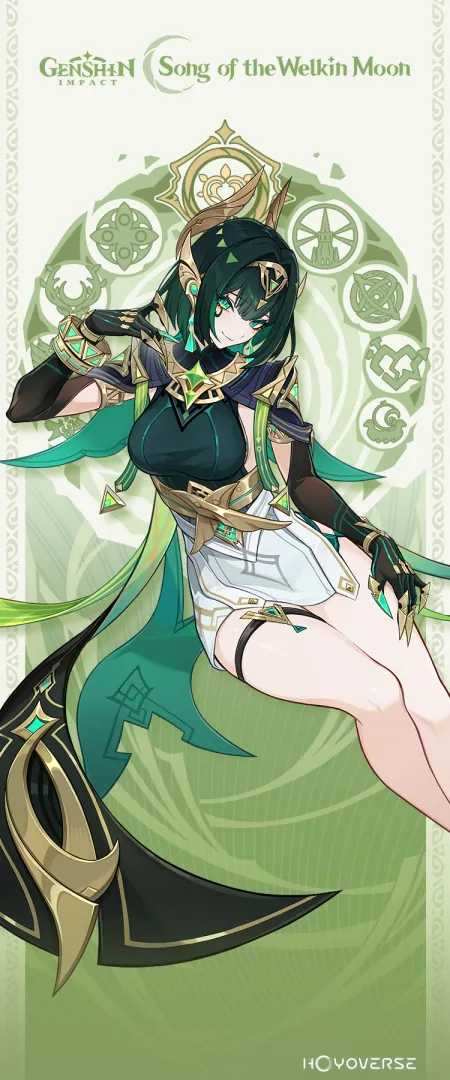
Nefer's kit? Her Elemental Skill triggers Shadow Dance, slurping up Verdant Dew to fuel Phantasm Performance Charged Attacks that summon shades. Sock her with 5 Seeds of Deceit, and her Burst DMG jumps 50%. Furina flips between Ousia (summoning 3 Hydro familiars for up to 75% team DMG bonus at C2) and Pneuma (for healing), making her a killer synergy for Nefer. Arlecchino slaps on Bond of Life (up to 145% max HP) to amp her Pyro Normals (7.5% consumption per hit), self-healing on Burst. Zhongli? He shreds 20% RES while his shields eat 100% elemental and physical DMG. I'd prioritize Phase 1's 4★s – Xingqiu at C6 for Hydro application, Collei for those Dendro cores, Yaoyao for sustain. First off, check your roster gaps. Then, knock out 10 pulls for guaranteed 4★s. Oh, and grab that free Collei from the Ruins Exploration event (October 22-November 11).
In the thick of planning your pulls, sometimes you just need a boost without the grind. That's where discount Genesis Crystals come in via Buffget – solid platform with killer prices, instant delivery, full game compliance, global server support, quick customer service, and rave reviews for smooth deals.
Matching Weapons to Your Pulls
Phase 1 pairs with Reliquary of Truth (5★ Catalyst: 542 base ATK, 88.2% CRIT DMG; boosts CRIT Rate by 8-16%, EM by 80-160 on Skill for 12s, and CRIT DMG by 24-48% on Lunar-Bloom for 4s). Furina gets Splendor of Tranquil Waters (5★ Sword). 4★ options: Sacrificer's Staff (620 base ATK, 9.2% CRIT Rate; +8-16% ATK, +6-12% ER off-field post-Skill) and Dawning Frost (510 base ATK, 55.1% CRIT DMG; +72-144 EM on Charged, +48-96 on Skill for 10s). Phase 2: Crimson Moon's Semblance (5★ Polearm for Arlecchino's CRIT/Bond scaling), Vortex Vanquisher (5★ Polearm – HP-scaling, but kinda meh for Zhongli). 4★s like Dragon's Bane (for reaction triggers) or Sacrificial Fragments (Lan Yan's pick). Epitomized Path? Two Fate Points for the guarantee. Start by checking your pity in the history. Aim Reliquary for Nefer's EM/CRIT needs. F2P? Favonius Warbow covers energy just fine.
Who Should You Actually Pull for in 6.1 Luna II?
Unpacking Nefer's Kit
Nefer picks up Ascendant Gleam from having 2+ Nod-Krai party members, turning Bountiful Cores into Seeds for those Veils stacks. Her Burst? AoE Dendro DMG scaled per stack. Build her to Level 90, Burst and Skill at 9, Normal at 6. Slap on 4pc Night of the Sky's Unveiling for extra Lunar DMG. Go EM sands (200+), Dendro goblet, CRIT DMG circlet (50%+ Rate, 1:2 ratio), 800+ EM total, and 200% ER. Team comp: Nefer + Furina (for Burst DMG buffs) + Collei (cores galore) + Yaoyao (heals). Ascension demands 46 Frostnight Herra drops. Stick to Lunar teams for 6x DMG per reaction – that's how you bust out of Gloomveiled state (+120% RES shred). (As an editor who's theorycrafted way too many Dendro teams, this one's a game-changer for core-based play.)
How Nefer Stacks Up in the Meta
Nefer's straight SS Tier DPS, outpacing Alhaitham by 20-30% in Nod-Krai Lunar-Bloom setups – based on community sims and Abyss clears. Furina? SS support with her 75% team buffs, edging out Yelan for Hydro application. Arlecchino hits S-SS with 40% Pyro DMG and 20% RES shred, but she's niche against Mavuika. Zhongli's solid S for shields, but skip if you've got Xilonen. Nefer's pros: killer single- and AoE DMG, self-buffs, C0 strong. Cons: Relies on Lauma for Dew, and she's interrupt-prone. Furina shines off-field with Hydro and heals, topping Abyss usage stats – but watch that HP drain sans sustain.
- SS DPS: Nefer, Mavuika, Skirk
- S DPS: Arlecchino, Neuvillette
- SS Support: Furina, Bennett, Kazuha
Test her in the trial first. Pull if your Dendro DPS is lacking. Save that guarantee for any 50/50 losses.
Weighing Constellations
Nefer's C0 is plenty strong; C1 amps her shades and DMG. Furina works at C0, but C2 unlocks that full 75% bonus. Arlecchino craves C1-C2; Zhongli's fine at C0. Aim for 76 pulls (13,000+ Primogems), or grab Welkin for ~3,780 extra (~94 pulls total). Struggling with low DMG? Make sure you've got 2+ Nod-Krai for Gleam, absorb all 5 Seeds, and equip Dawning Frost. Verify Skill at level 8+. Burst Furina first in rotations. Tweak ER to 200%.
Peeking Ahead: December 2025 Banners
What's on Deck for 6.2
Version 6.2 drops December 3, 2025, running to January 13, 2026. Phase 1: December 3-24, Durin (5★ Pyro Sword DPS/support) + Varesa (5★ Electro Catalyst rerun), with Jahoda (Anemo Bow healer) as boosted 4★. Phase 2: Xilonen and Venti reruns. Durin flips Essential Transmutation for Confirmation of Purity (on Normals) or Denial of Darkness (Skill); her Burst calls Dragon of White Flame or Dark Decay, slashing RES after reactions. Stock up on Pyro materials – F2P haul could hit 12,000-15,000 Primogems.
Fresh Faces on the Horizon
Durin's got SS potential as a Pyro hybrid support, tying into Khaenri’ah lore with Hexenzirkel buffs for Mondstadt crews. Jahoda brings Anemo healing plus VV shred. Story quests and Witch’s Homework toss in temp talents; the November 20, 2025 livestream locks it down with 300 Primogem codes. Hoard Intertwined Fates. Farm Saurian Sojourn for 420 Primogems and Blazing Sacrificial Heart's Hesitance. Keep an eye on leaks – they shift sometimes.
Rerun Wildcards
6.2 builds on 6.1's Lunar from Bloom, loving Venti for grouping. If you're F2P, maybe skip 6.1 Phase 2 to chase Durin – Arlecchino and Zhongli feel weaker without Lunar ties. (My take: Venti's always a safe bet for crowd control, but Durin's lore drop has me hooked.)
Midway through mapping your gem strategy, smart resource plays keep you in the game across phases. Buffget steps up with Genshin Impact top up online – folks love the cheap rates, minutes-to-credit speed, ban-proof security, all-region coverage, helpful support, and glowing reviews for easy, reliable vibes.
Smart Pull Strategies and Pity Breakdown
Demystifying Soft and Hard Pity
On character banners, soft pity kicks in at 76 pulls (1.6% 5★ rate), hard guarantee at 90. 50/50 for featured, and a loss means the next one's yours. Weapons? 80 for hard pity, 0.7% base 5★. 4★s every 10 at 5.1%. Chronicled Wish runs separate 90-pull pity for reruns. Track it by exporting in-game history. Pull in 10x batches. Pity carries within 6.1 but resets for 6.2. Beginner's Wish? Guarantees Noelle on the 10th pull, no 50/50, capped at 20 pulls.
F2P Planning That Actually Works
Bank ~70 pulls from those 9,380 Primogems; zero in on Phase 1 Nefer (C0 SS Tier). Each Intertwined Fate costs 160 Primogems; events cough up 16 Intertwined + 15 Acquaint Fates.
- Dailies: 60 Primogems/day
- Abyss: 1,600/month
- Imaginarium: 1,300
- Ruins Exploration: Primogems + free Collei
Prioritize Nefer for the Dendro meta shift. Use a 50/50 loss on Furina. Shoot for 180 pulls total across phases.
Tips for Whales Diving In
Welkin + Battle Pass nets ~13,840 Primogems (~102 pulls); drop it on Arlecchino C2 for SS Tier without Mavuika. Epitomized Path locks Crimson Moon's Semblance at 2 points. Weigh DPS against sustain. Pull weapons after character wins. Test Abyss rotations for real ROI.
Pitfalls to Dodge in Your Pulls
Don't Overpull on Meh Banners
Resist splitting pulls without a guarantee – Phase 1 Nefer trumps Phase 2 Arlecchino (she needs heavy setup sans shields). Stash 13,000+ Primogems pre-patch; run the trials. Sacrificer's Staff boosts Nefer's ER nicely. Overpulling here means missing 6.2 Durin, though your next guarantee softens a 50/50 hit.
Weapon Banners Aren't Always Worth It
Skip 'em unless it's the signature – Vortex Vanquisher's HP scaling flops for Zhongli (Black Tassel does shields better). Dragon's Bane handles reactions fine as a 4★. Commit to Arlecchino before chasing Crimson Moon. Got alternatives? Pass. Track those Fate Points.
Don't Sleep on Team Synergy
Got Xilonen? Skip Zhongli. For Nefer's low DMG, slot in Lauma for Dew and max Seed absorption. Her teams run easy 15-20s on-field rotations – downside, she's interruptible without Zhongli. Evaluate your roster. Farm Frostnight Herra ASAP. Event Yaoyao covers sustain.
Handy Tools for Staying on Top
Simulating Your Wish History
Hit Paimon's Menu for pull logs; mock up pity with a spreadsheet. Eyeball your ~70 F2P pulls for 6.1. Note counts post-update. Log each 10-pull. Export for 90-guarantee math.
Crunching Primogem Numbers
Events like Saurian Sojourn (420 Primogems), Dance Dance Dynamic Disco (Primogems and Mora), and Ruins Exploration (Crown of Insight x1, Philosophies of Moonlight). Grand total: 12,000-15,000 in 6.1 with Welkin. Tally dailies and events. Toss in livestream codes. Plan 6.2 EM sands farms.
Leaning on Community Tier Lists
SS Tier goes to Nefer (DPS) and Furina (support) for Abyss clears and flex – 6.1's Lunar shift outshines 5.8. Check HoyoLab for Miliastra UGC challenges; Nefer shines in Nod-Krai quests. Reference endgame viability. Tweak for your teams. Update monthly. (Subjective note: These lists evolve fast – I've seen Nefer climb quick based on early clears.)
How 6.1 Banners Shake Up the Meta
Top Teams Featuring Nefer
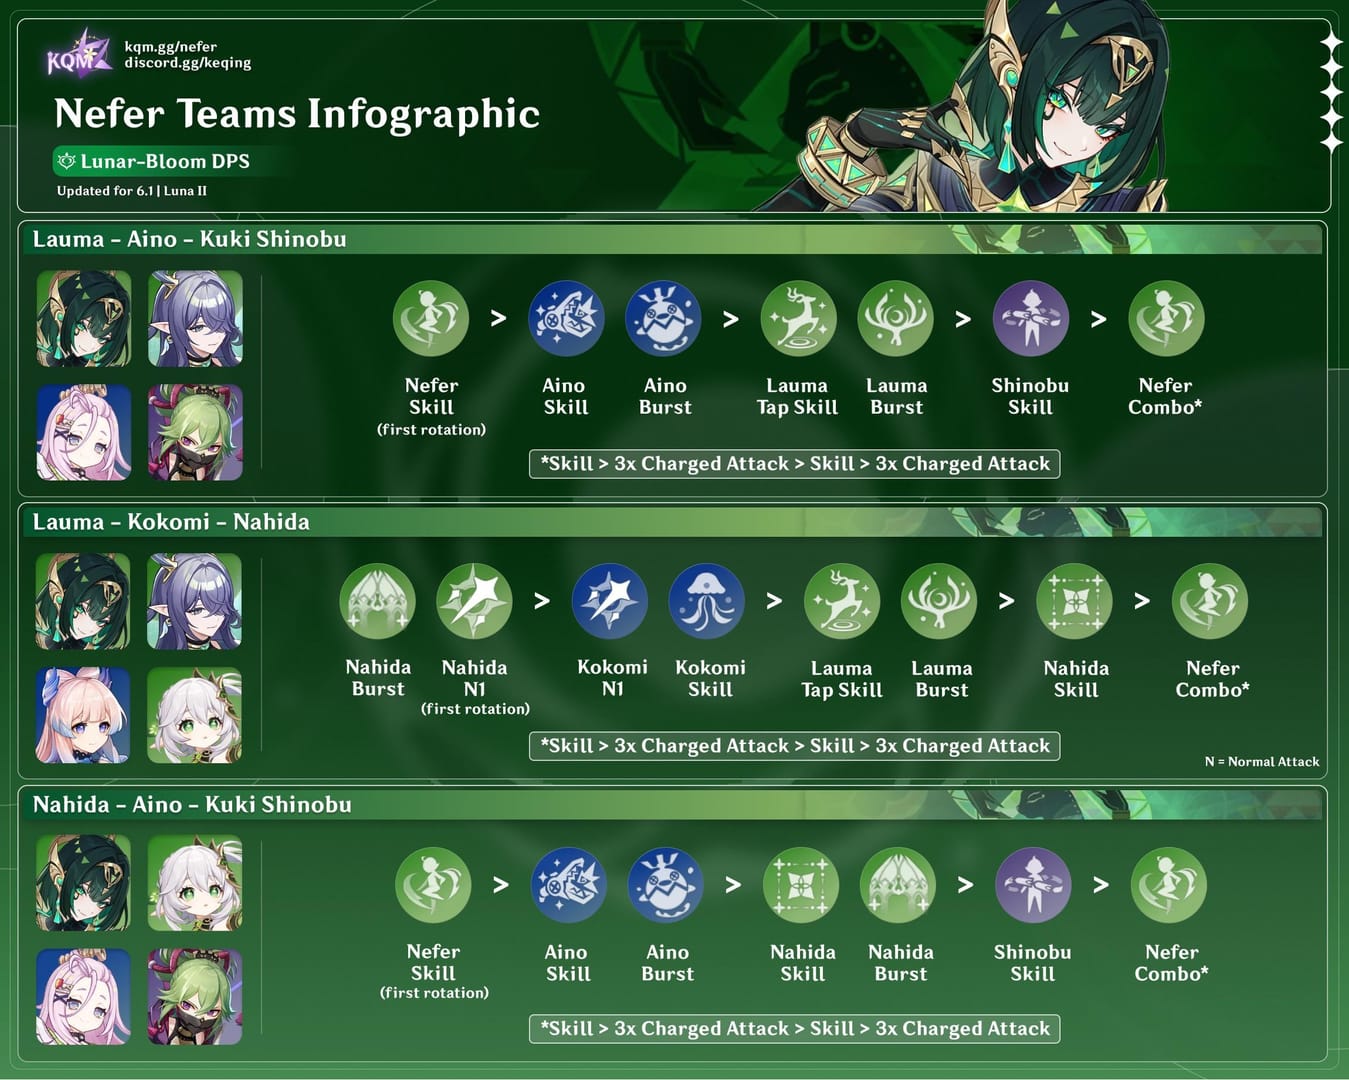
Hypercarry style: Furina Burst > Nefer Skill/Burst (gobble those Seeds) > Collei Skill > Yaoyao Burst. Pump 800+ EM for reactions. Frontloads DMG for Abyss 9-12 clears. Keep Nefer on-field 15-20s for max stacks. Hydro pairs like Xingqiu convert Bloom perfectly.
Stacking Against Older Releases
Nefer edges Alhaitham in Lunar frontload, per sim data. Furina's 75% team bonus tops Yelan's. Power creep's minimal – Deepwood Memories holds until new sets. 6.0's Lauma boosted Nod-Krai; 6.1's Lunar lifts Dendro 20-30%.
Why These Have Staying Power
Nefer at C0 sets up 6.2 Durin Pyro synergy; Furina's universal. Arlecchino's niche. Killer F2P value with event 4★s. Build and test. Farm event talents (Philosophies). Scale toward 6.3 Columbina leaks.
Gearing Up for What's Next
Primogem Farming Without Burning Out
Dailies give 60/day, Abyss 1,600, events 1,840 total. Ruins Exploration: Nail 3 mini-games for Primogems, Hero's Wit, Agnidus Agate. Hit AR 20+ quests. Claim dailies. Clear Spiral fully each month.
Jumping into Events
Miliastra Wonderland (October 23): Deck out Manekins, no-code maps for cosmetics and furnishings. Saurian Sojourn: Timed challenges for 420 Primogems. Unlock via Prologue. Share your stuff. Claim dailies (October 22-November 11 for Ruins).
Patch Cycles and Leak Watching
Patches monthly; 6.2 on December 3 follows the pattern. Leaks peg Durin as SS – but verify. Redeem codes quick. Pre-farm Pyro for Durin. Save for 75-90 pulls.
Wrapping It Up: Key Takes and FAQs
My Pull Recs in a Nutshell
Go hard on Phase 1 Nefer/Furina for Lunar dominance; bank for 6.2 Durin. Track pity, farm ~9,380 Primogems, EM-focus builds.
Fast Pull Decision Guide
- Nefer: Yes if you need Dendro DPS (SS Tier)
- Furina: Always (universal SS)
- Arlecchino: Only sans Pyro options (S Tier, investment-heavy)
- Zhongli: Newbies only (S Tier shields)
- F2P? Skip Phase 2 for 6.2
FAQs
What are the current Genshin Impact banners in November 2025?
Phase 1 (Oct 22-Nov 11): Nefer and Furina with Xingqiu/Collei/Yaoyao boosts; Phase 2 (Nov 11-Dec 2): Arlecchino and Zhongli with Lan Yan/Rosaria/Yun Jin.
Who is Nefer in Genshin Impact 6.1?
5★ Dendro Catalyst DPS from Nod-Krai, specializing in Lunar-Bloom reactions via Shadow Dance Skill and Seed absorption for Burst DMG stacks up to 50%.
Should I pull for Nefer in 6.1?
Yes, for SS Tier Lunar meta; C0 viable with F2P 4★ like Collei. Pros: High frontloaded DMG; cons: Needs Nod-Krai teammates.
What are the next banners after 6.1?
Version 6.2 (Dec 3, 2025): Phase 1 Durin (5★ Pyro Sword) and Varesa; Phase 2 Xilonen/Venti reruns, per historical schedules.
How does the pity system work in Genshin banners?
Soft pity at 76 pulls (1.6% 5★ rate), hard at 90 guarantee; 50/50 featured chance, carries over phases. Track via Wish history.
Best F2P strategy for Genshin Nov-Dec 2025 banners?
Save ~70 pulls from 9,380 Primogems; focus Phase 1 Nefer, use events for free Collei/Yaoyao. Avoid splitting; farm dailies and Abyss.